How to recover digital photos
The advent of digital cameras, smartphones, tablets and other gadgets has made it incredibly easy to capture our precious unrepeatable moments through photographs. And, in contrast to their physical analogs, the modern-day photo albums do not have to be crammed or bulky, since they can be conveniently organized on various devices like USB sticks, flash memory cards, hard disk drives and SSDs. Yet, going digital in this case has one significant drawback – the potential for data loss is lurking in the very nature of this kind of storage. Whether due to accidental deletion, formatting, or unforeseen system glitches, the impact of losing single-copy pictures can indeed be disastrous. In view of this, it's essential to have a plan in place for immediate photo recovery. In this article, we'll look into how you can restore those lost images with the help of the Raise Data Recovery software.
Raise Data Recovery has been designed to aid in retrieving lost or deleted files from various storage devices. It's an easy-to-use solution for those seeking a straightforward way to recover photos after they have been mistakenly removed, destroyed by quick formatting or corrupted as a result of software or hardware malfunctions. The program supports a wide range of file systems and types of media, providing the compatibility with most holders of digital photo content. Moreover, it understands the specifics and recognizes numerous photo formats, including the RAW ones of Sony, Nikon, Canon, Apple, Fujifilm, Panasonic, Olympus, and many others brands. The foregoing strengths make this software a front-runner among other photo recovery options.
But before we move on to photo recovery by means of this tool, please take a look at some rules you should observe during the process in order to avoid making the most common mistakes.
How to recover deleted or lost digital photos
Whether you're a professional photographer or lost your personal shots snapped with your smartphone, Raise Data Recovery will help you restore those invaluable pictures, regardless of the format they were captured in. Just stick to the following simple steps:
-
Download Raise Data Recovery onto the computer that will be used for photo recovery. You may install it like any regular software, but choose a destination storage other than the one being recovered. Please rely on this installation guide if you need precise instructions.
-
Plug in the storage device containing the pictures you want to get back. You may choose any type of direct connection applicable for this type of storage, for example, a USB port for a thumb drive, a USB cable for an external HDD or SSD, a memory card reader for a flash card and so on. In addition, familiarize yourself with some safety rules to follow while restoring data from an external drive.
In case your drive is internal, simply go ahead to the next step.
-
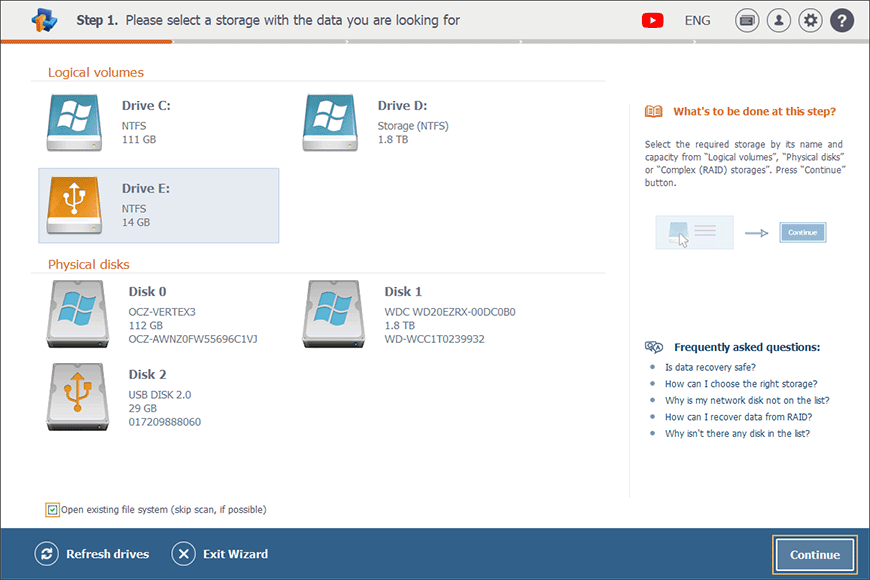
Launch Raise Data Recovery and find your storage or a partition of it on the Physical disks or Logical volumes pane of the main window.

If you want to check the content to make the right decision, you may employ the Open existing file system (skip scan, if possible) option and click Continue.
In the event that the entire device is missing in the program, this tutorial may help you to handle the issue.
-
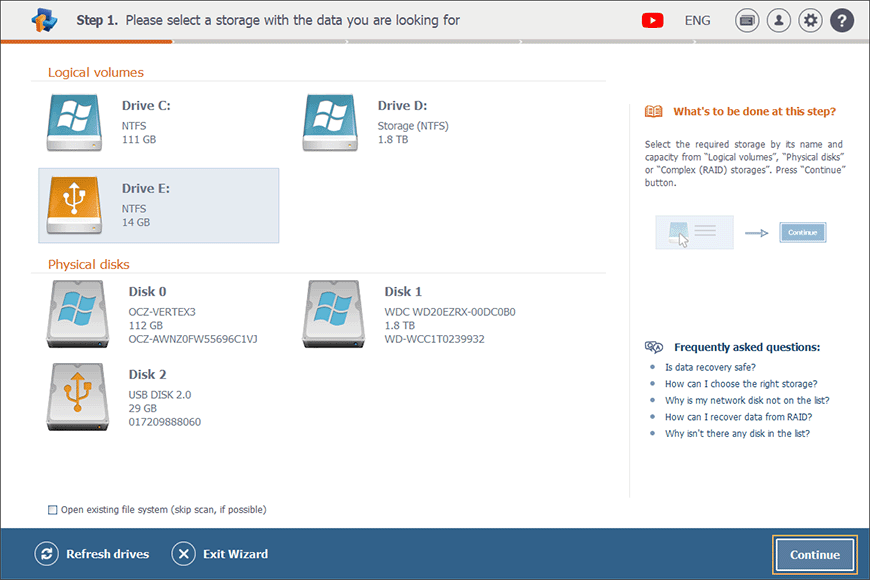
Click on this storage twice or select it and then press the Continue button in the bottom right corner to start analyzing it.
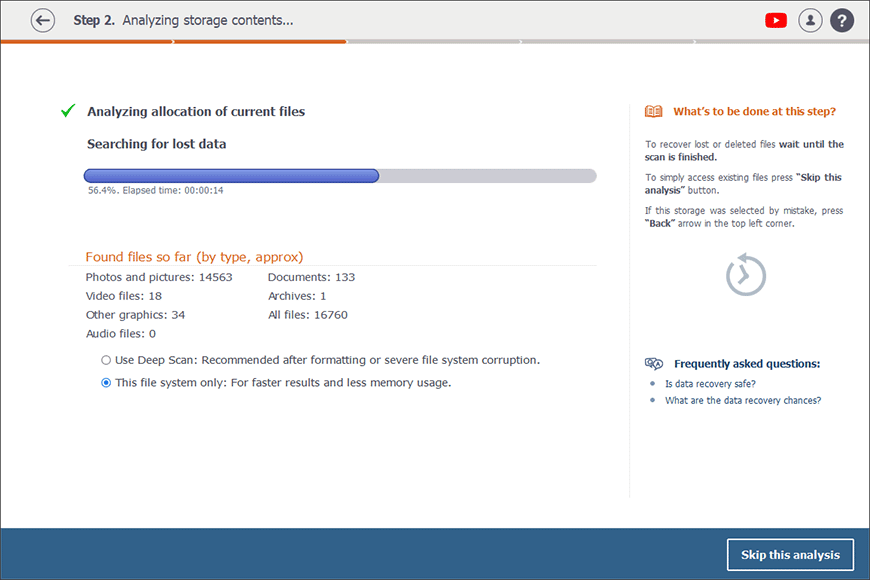
Choose among the Use deep scan and This file system only scanning options. Select the necessary one depending on whether the file system of your storage is ok or damaged and whether you’ve performed a quick format resulting in the disappearance of photos.
-
Hold on until Raise Data Recovery completes the scanning procedure. You may monitor its progress with the help of a progress bar.
-
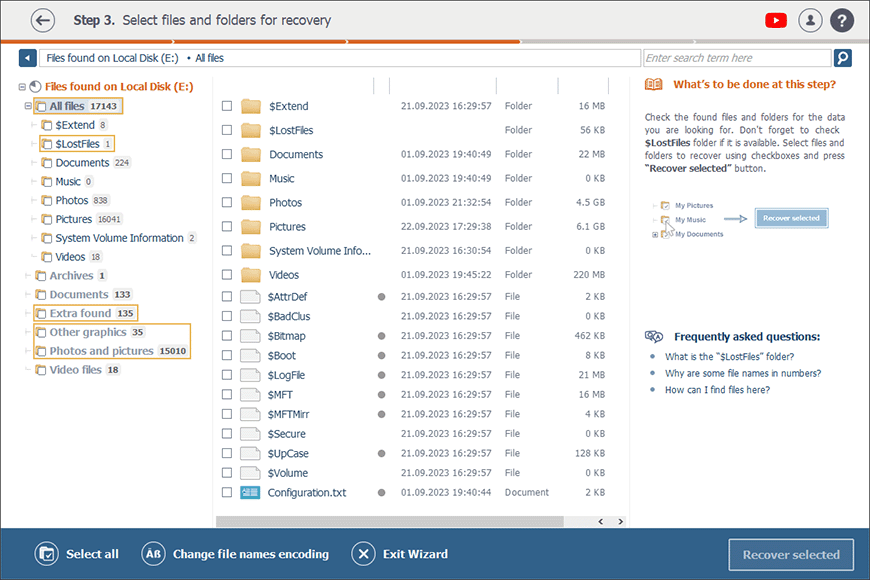
Once the scan is finished, you will be presented with the recovery result.
All recovered files will be grouped by types into different folders. If you prefer seeing them exactly as they are presented in the scanned storage, just open the All files folder.
On the other hand, you can quickly find all photos, both the currently available and the restored ones, recollected in the Photos and pictures folder with the JPEG Images, MRW Raw Photos and other subfolders.
Please also check the automatically generated Extra found, $LostFiles and $Recycle.Bin folders, if you can’t find your missing photos in their native folders nor in the above mentioned automatically generated ones.
-
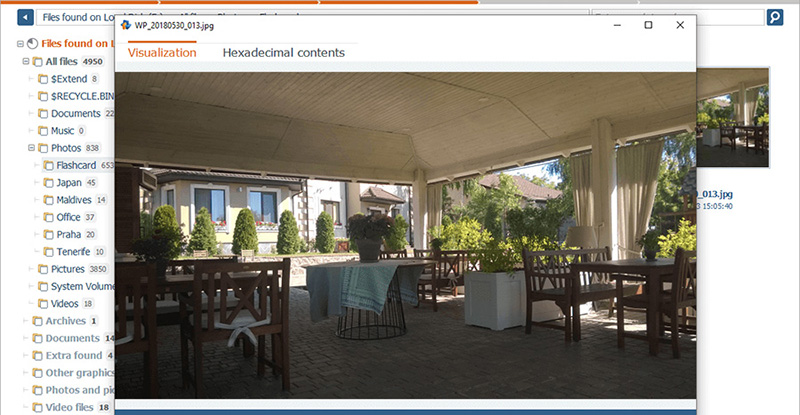
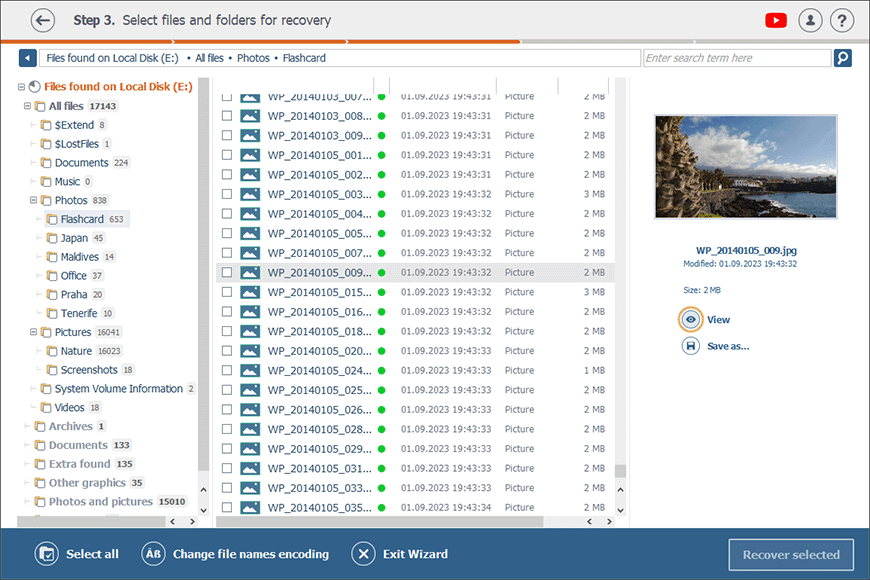
Search for the photos you wish to restore. The easiest way to spot them is to use the embedded preview function – just double-click the file in question or select it and hit the View button on the right. The thumbnail will also instantly appear in the right pane once you select a file, provided that its format is supported for preview. If you need more information on how to find, select, preview and save files in Raise Data Recovery, please refer to the corresponding article.
-
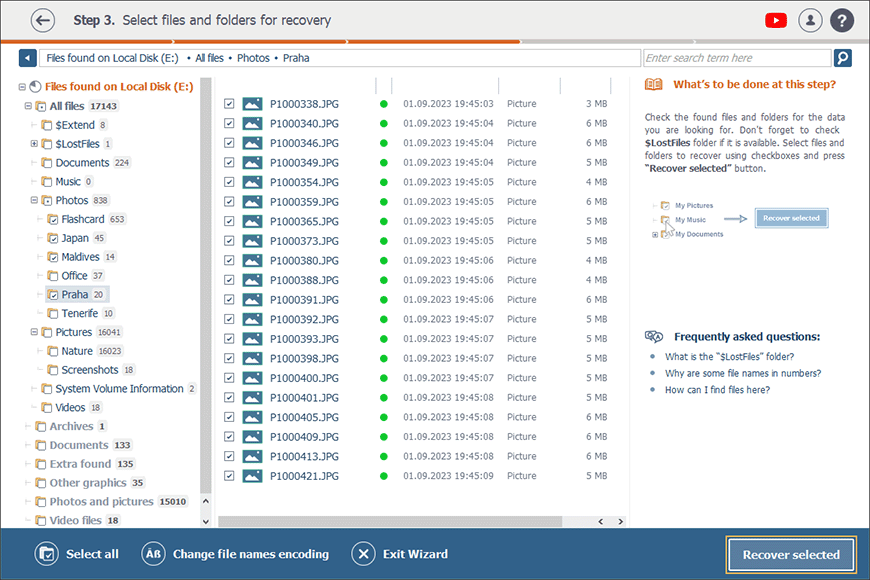
Once you've found the necessary pictures, tick each of them off and hit the Recover selected button.
-
Choose a location to save your recovered photos, click Start recovery and wait until they are copied.
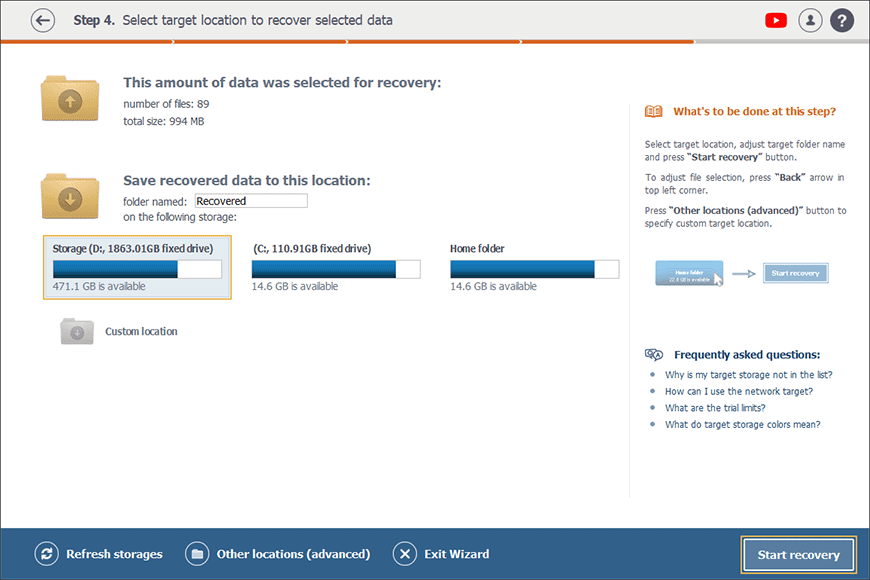
Yet, you should mind that it's forbidden to save the recovered files to the very same storage they've been lost from. This will put them under risk and may even lead to irremediable data loss.
Please also consider that the free trial version of the application will permit you to save an unlimited number of files of under 256 KB each. If your photos have larger sizes, you may need to order a license for Raise Data Recovery in accordance with the instructions from the related article.