Storages navigation area
Overview
The storages navigation area appears in the main window of the program. It displays all the data storages that are presently detected by Raise Data Recovery and available for further operations.
In general, there are two basic panes and an optional one that appears only when the software detects a complex (RAID) storage.
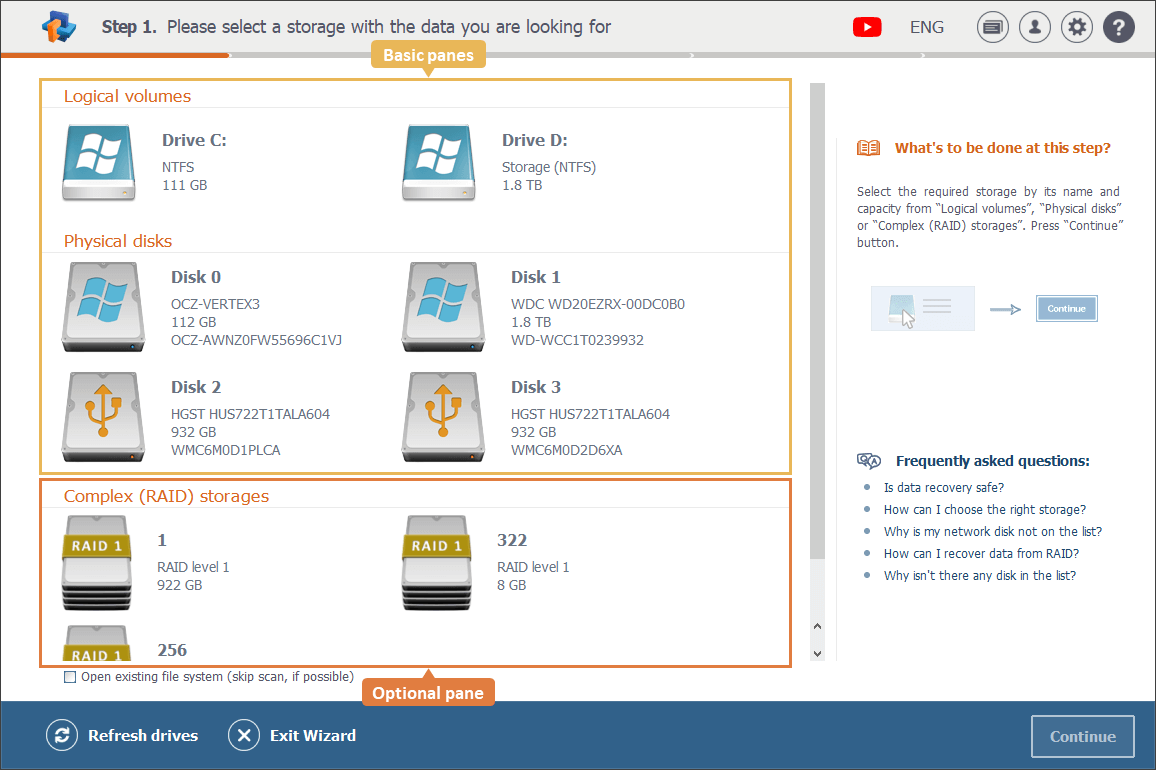
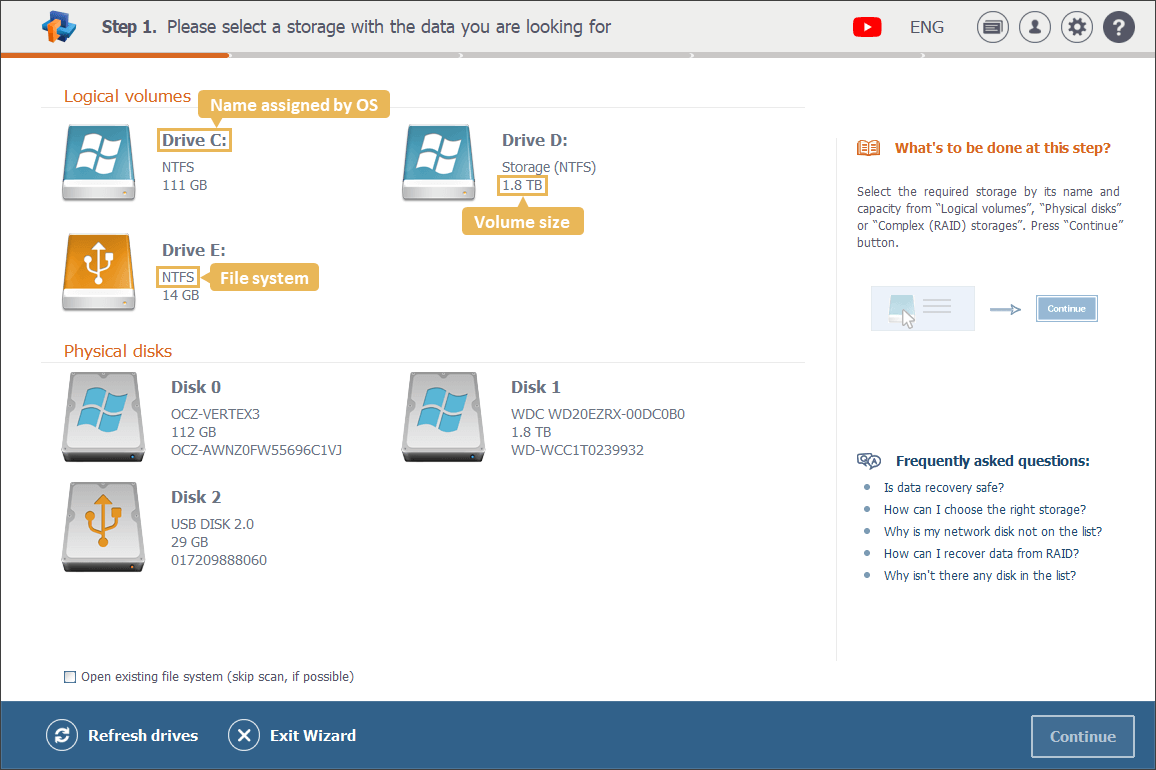
The disk volumes recognized by the current operating system are listed in the "Logical volumes" pane. There, every item is represented with the name the OS assigned to it according to the existing naming convention (for example, a drive letter in case of Windows, or a drive name plus a partition number on Linux and so on). The employed file system type and the total size of the volume are also specified below each of them.
In the "Physical disks" pane, one may find all the physical storage devices detected by the software. They can be easily differentiated by their icons.
![]()
In addition, every physical disk is displayed with its model/type, total capacity and identifier (in case of hard disk drives and solid state drives).
How to use
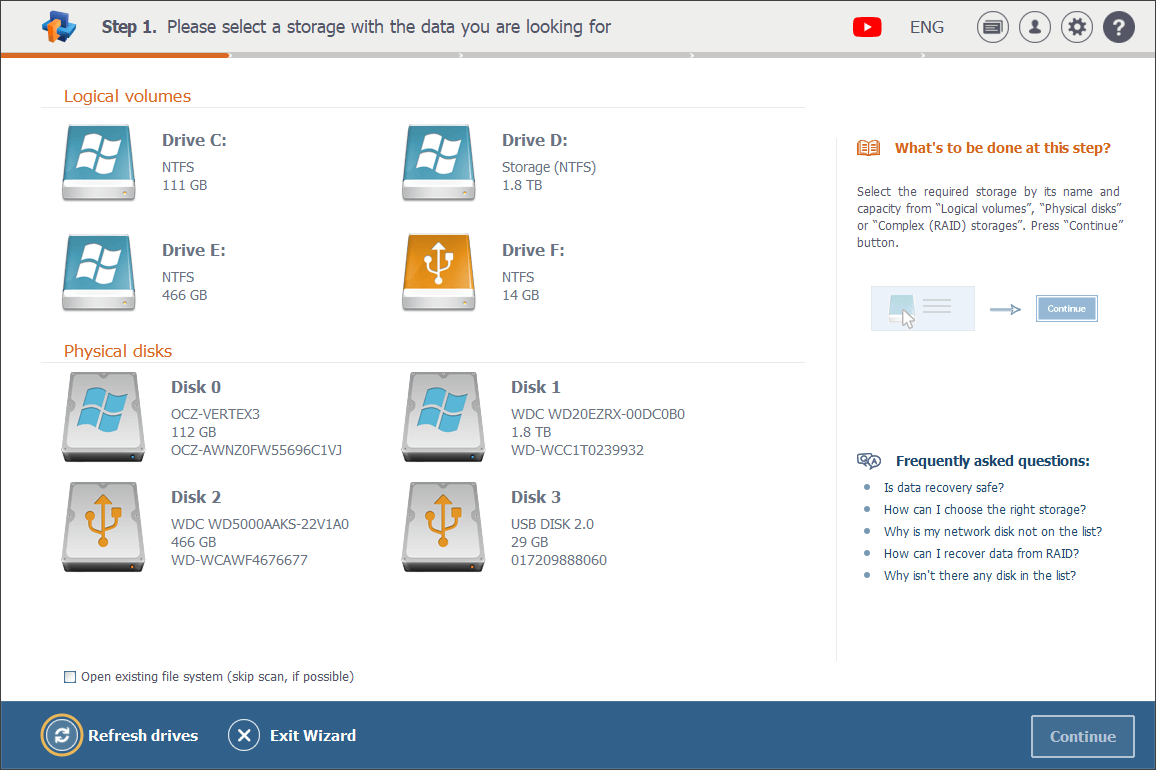
The storages navigation area is updated automatically after every (re)start of the software and presents all the detected physical data storage devices that are currently connected to the local PC, provided that the program is launched with elevated privileges.
Please note that all the storages that show up in the interface of Raise Data Recovery are just virtual representations of the real objects. Thus, they can be processed in a safe read-only mode, avoiding that the program writes anything to the initial storage devices.
On the other hand, you can make the program update the storages navigation area manually using the "Refresh drives" function of the buttons area.
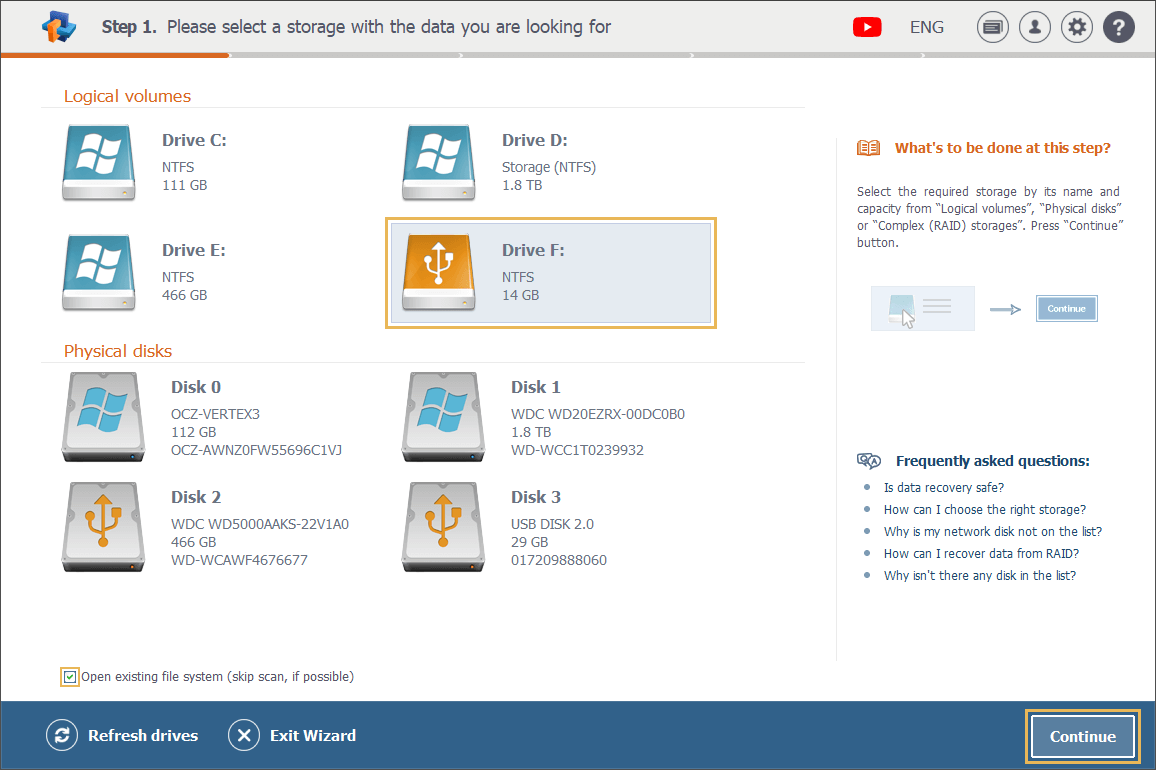
In order to process a storage, first select it on one of the panes. You can do it with a single click of the mouse or by pressing the arrow keys on the keyboard. In its turn, a double click on a storage, as well as hitting the "Continue" button in the bottom right corner, starts its scanning for lost data.
And to view the content of a storage in Explorer (an incorporated file browser), select it, tick the option "Open existing file system (skip scan, if possible)" below and then press "Continue".
Storage icons interpretation
In Raise Data Recovery you can distinguish between different types of storages by their icons:
![]()
This icon is used for logical volumes. The logo on it may vary, depending on the employed operating system (Windows, macOS or Linux).
![]()
This icon is generally used for internal and external hard drives and solid state devices.
The logo on the icon indicates the operating system employed on the device:
![]()
By this icon one can differentiate USB-connected devices like flash drives and flash memory cards.
![]()
This icon is used for an automatically assembled complex RAID-based storage, for instance, a NAS device. There might be several RAIDs that can be differentiated by the color of their bands: the green one indicates a properly assembled complex storage and the yellow one - its constituent.
![]()
![]()