Explorer (file browser)
Overview
With the help of Explorer, an in-built file browser, it’s possible to examine the content of a particular file system in a virtual mode, whether it's currently available on a storage (logical volume or physical device) or has been reconstructed by the program as a result of a scanning procedure. Moreover, this file browser also allows previewing, selecting and saving the recovered files/folders.
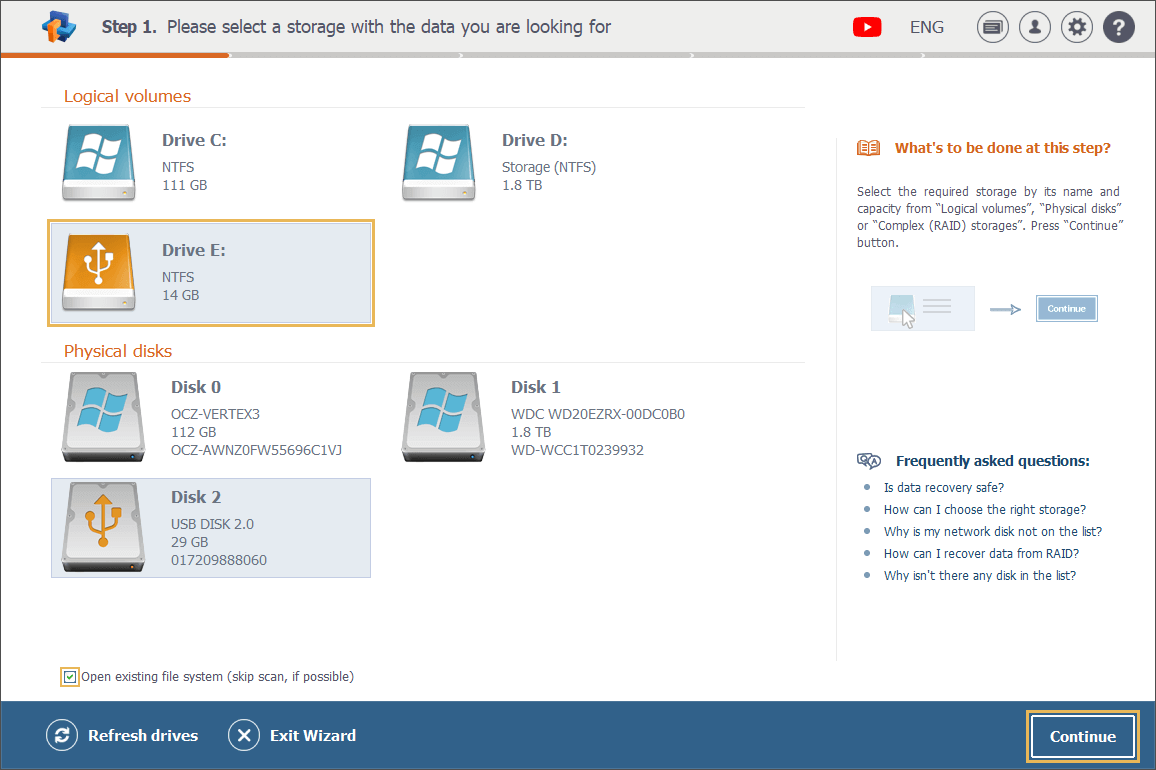
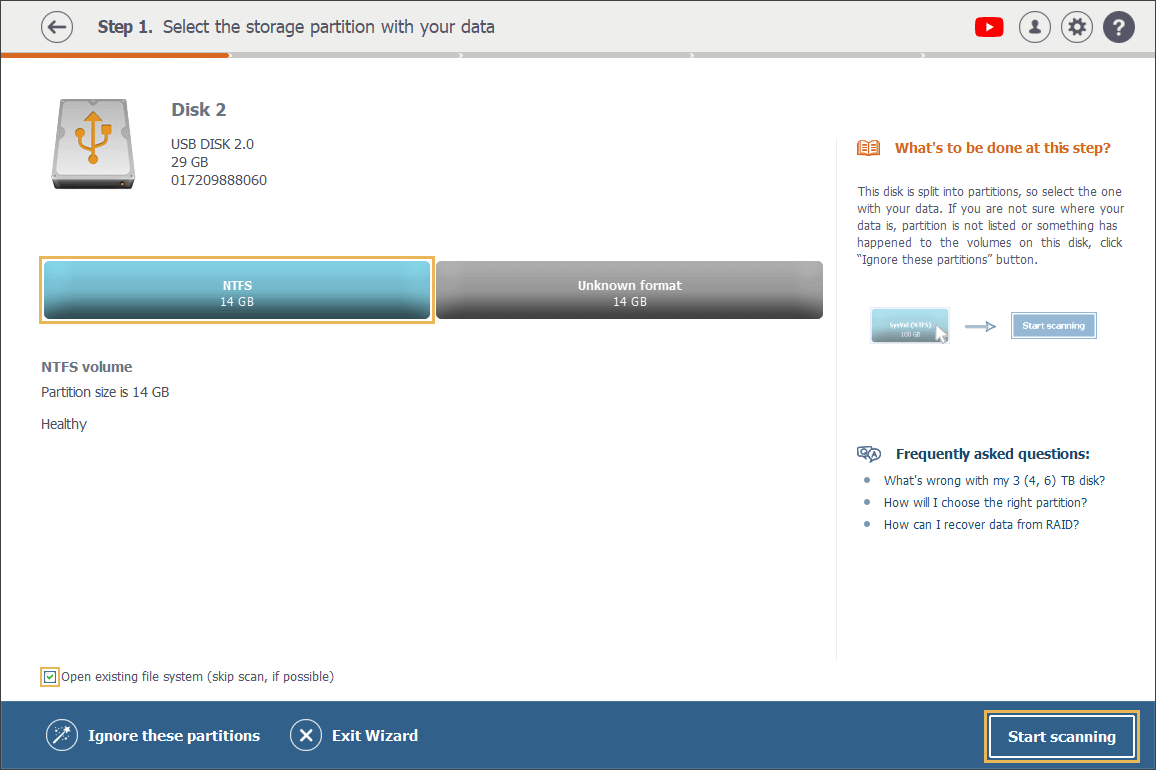
To view the content of a logical volume in Explorer, select it in the storages navigation area with a single click or using the arrow keys on the keyboard, tick the "Open existing file system (skip scan, if possible)" option below and hit "Continue" at the bottom bar. And as for a physical device, the procedure is almost identical except for two more steps to take: after pressing "Continue", select a partition to view and then click the "Start scanning" button below.
At the end of every scanning procedure, the Explorer tool is launched automatically.
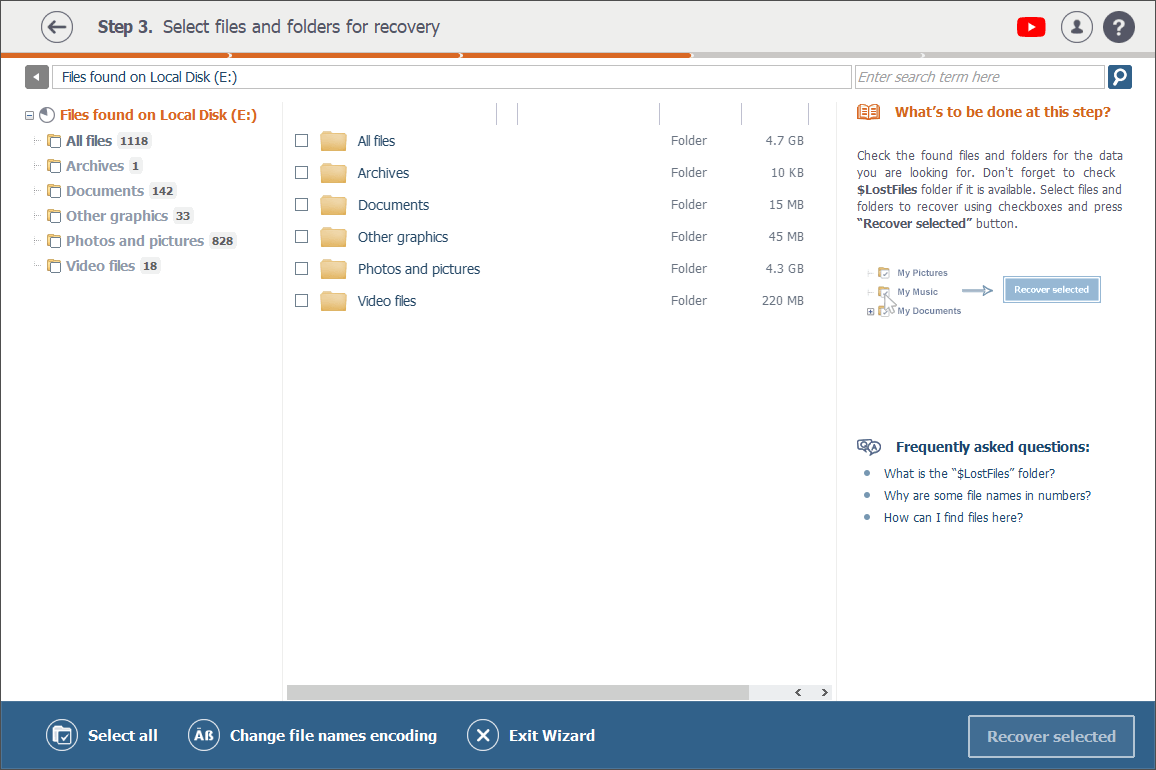
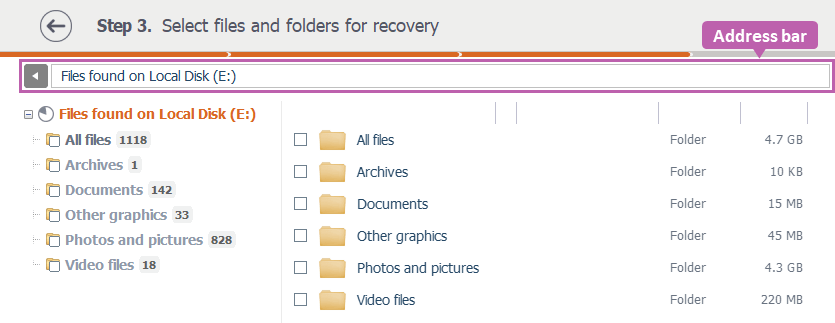
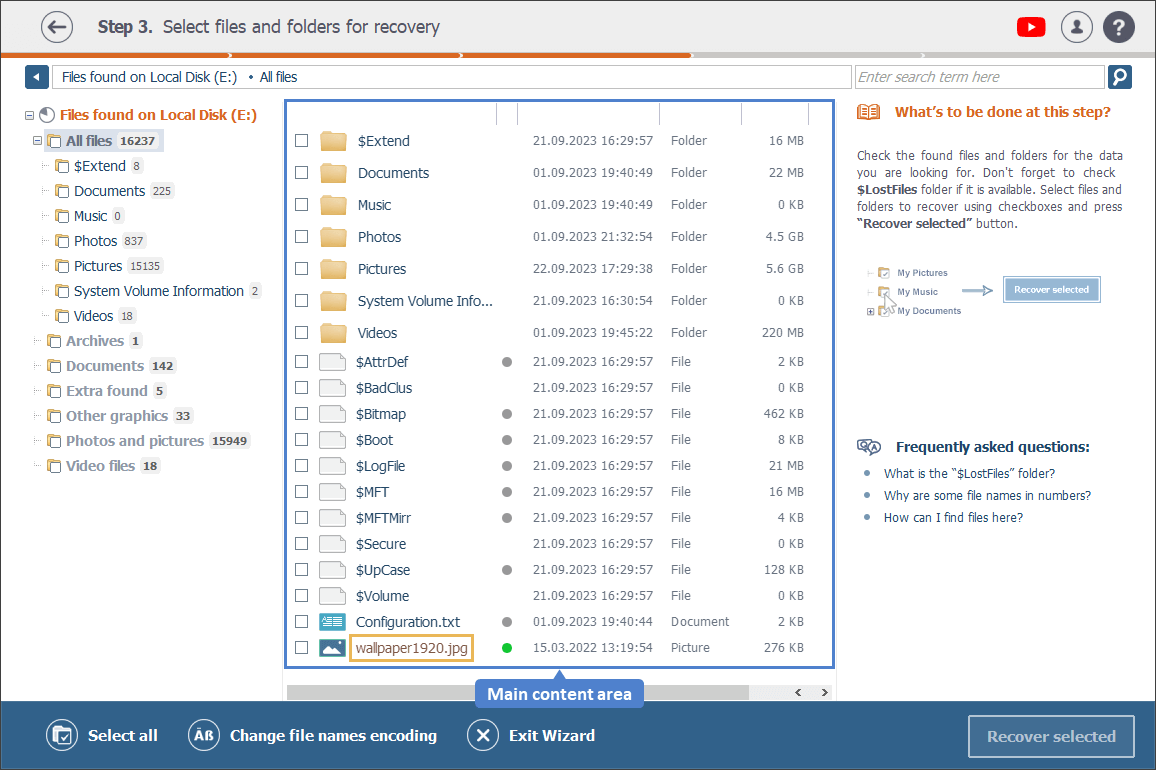
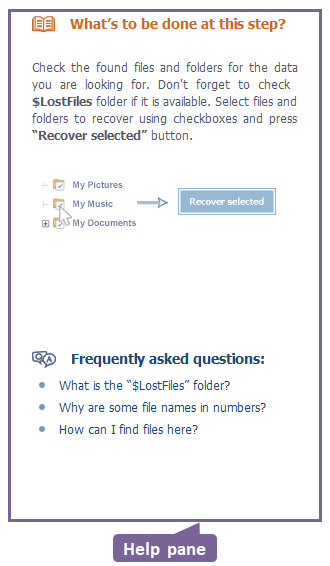
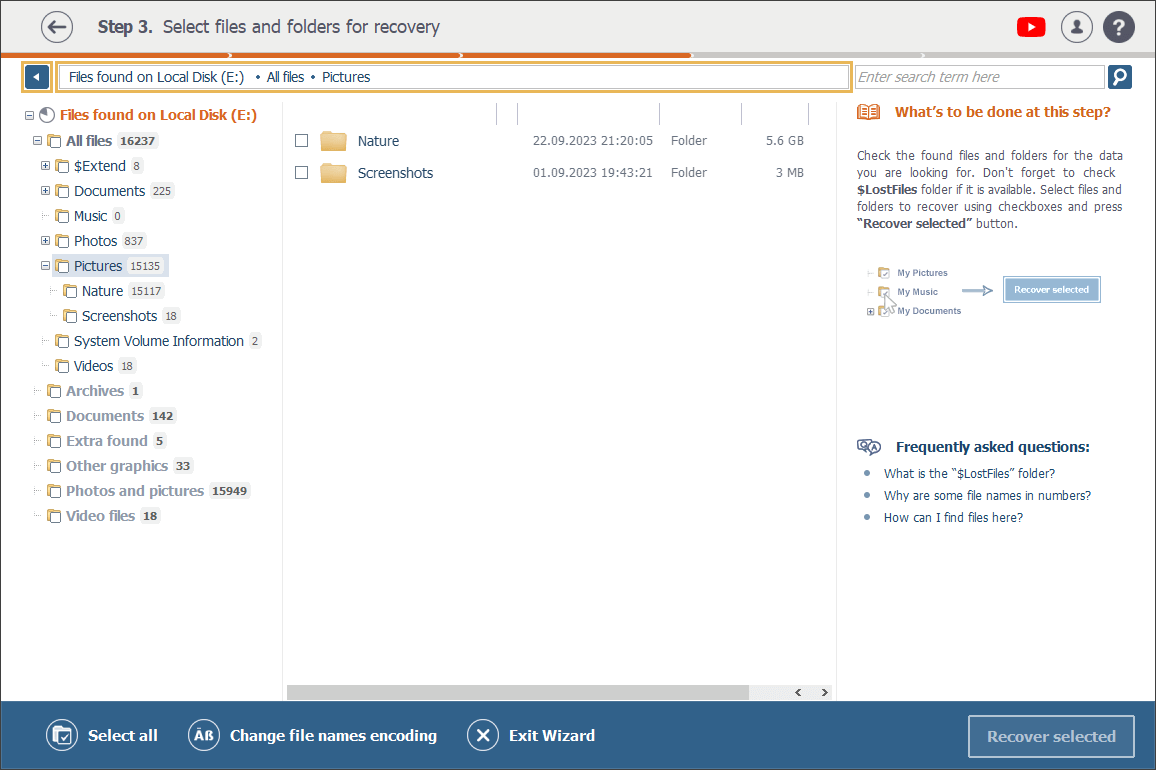
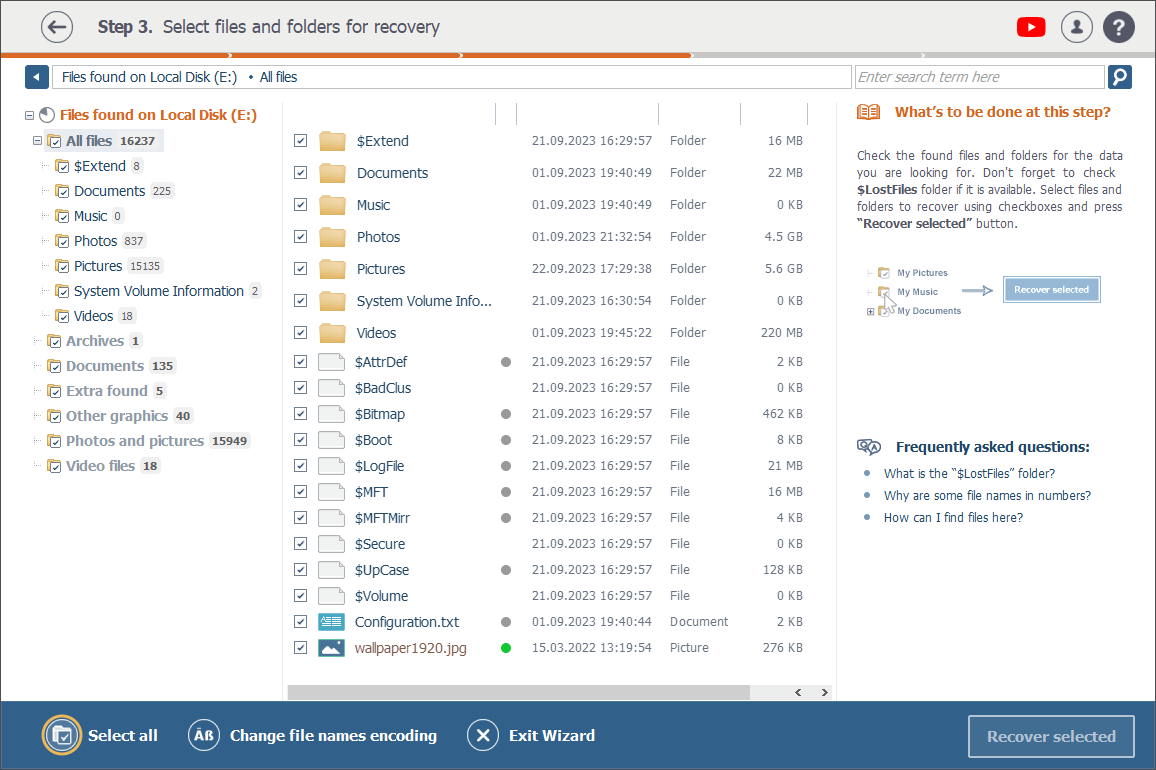
The Explorer window itself consists of the folders navigation pane (1) on the left, the address (2) and search bars (3) at the top and the main content area (4) in the center. In addition, there is the buttons area (5) at the bottom and the "Help" section (6) on the right.
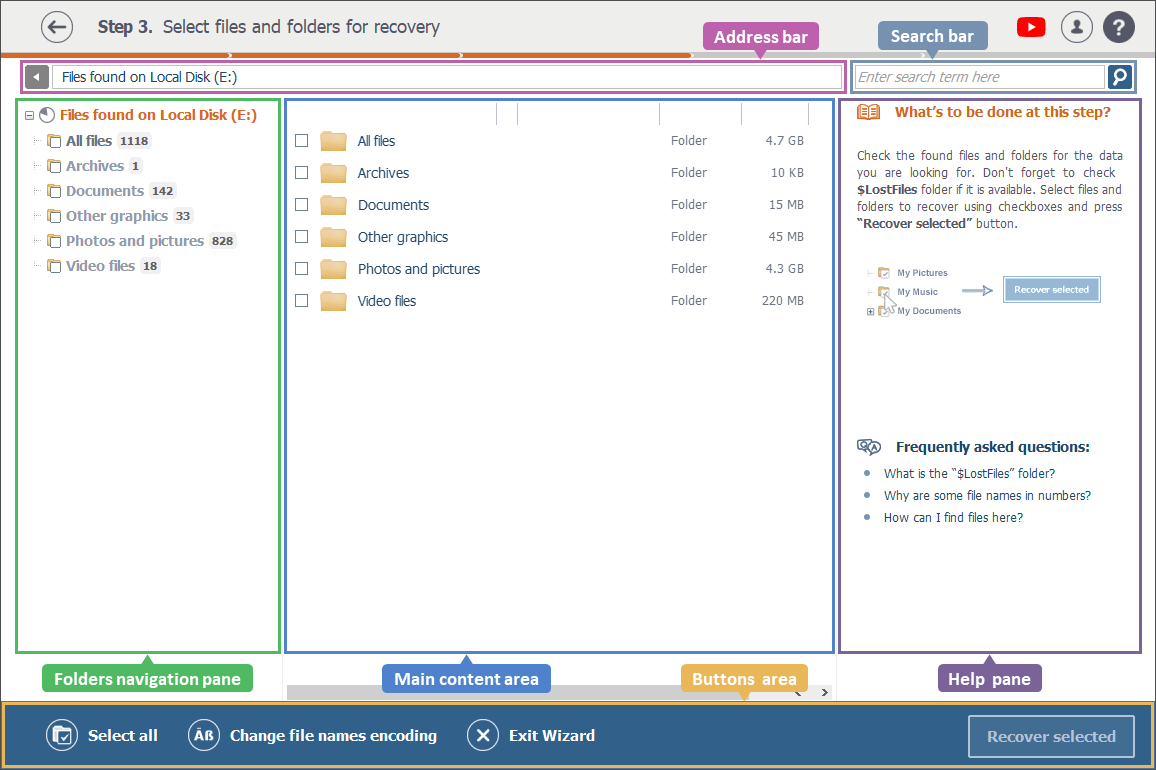
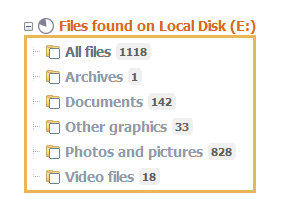
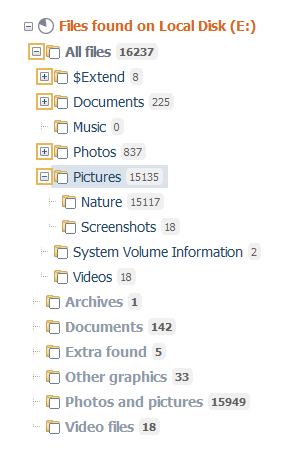
This pane serves for more convenient browsing through the detected content. It is represented in the form of a tree. The name of the tree's main element (marked in orange) corresponds to the name of the logical volume that has been scanned, or, if the latter has been severely damaged – to the name of the physical storage device.
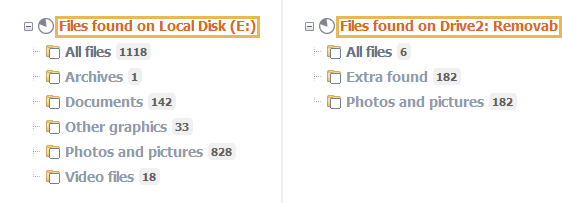
All the folders that belong to the scanned data source are displayed as its child nodes. The folders highlighted in bold are virtual containers that make the navigation by the found files easy and fast. Each folder also has a number next to it, indicating the quantity of files in this very folder.
Depending on your needs, you may open the "All files" folder and look for your restored files among all the files of a storage.

The structure of its content will mainly reflect the initial folder structure of the volume. In addition, there might be several extra folders, like $LostFiles. The latter is the place to find those items that have lost their original full paths.
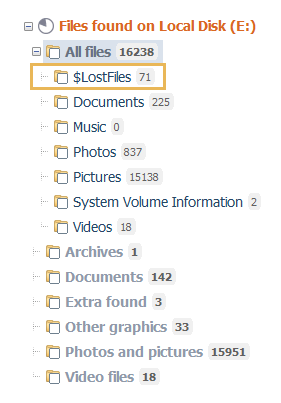
Alternatively, you may save time and effort by using the folders created by the program for the discovered files according to their types: including archives, documents, photos, video files and others.
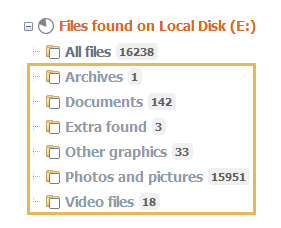
The files that have been detected as the result of search by known or raw content (see the Software settings section of the manual) can also be assigned to the "Extra found" folder.
-
Address bar
The address bar shows the path to the folder that is currently selected in the folders navigation pane. When you select a folder in the folders navigation pane, a small left arrow button next to the address bar becomes active letting you return immediately to the previously selected folder in that very pane.
-
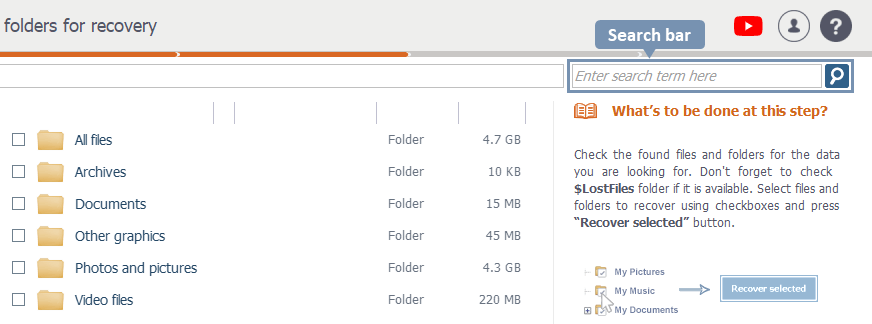
Search bar
The bar positioned above the main content area helps to find files and folders. Just write the full name (or at least a part of it) of the file or folder you are looking for in this bar. Alternatively, you may enter an extension to find all the files of a specific type.
-
Main content area
All files and folders, except for the containers created automatically by the program, are presented in the main content area of Explorer the same way they appear in the file system: together with names, last modification dates and sizes. However, the names of the files may differ in color: those files that have been restored will show up with brown names.
-
Buttons area
The buttons area at the bottom of the Explorer window includes four items:

-
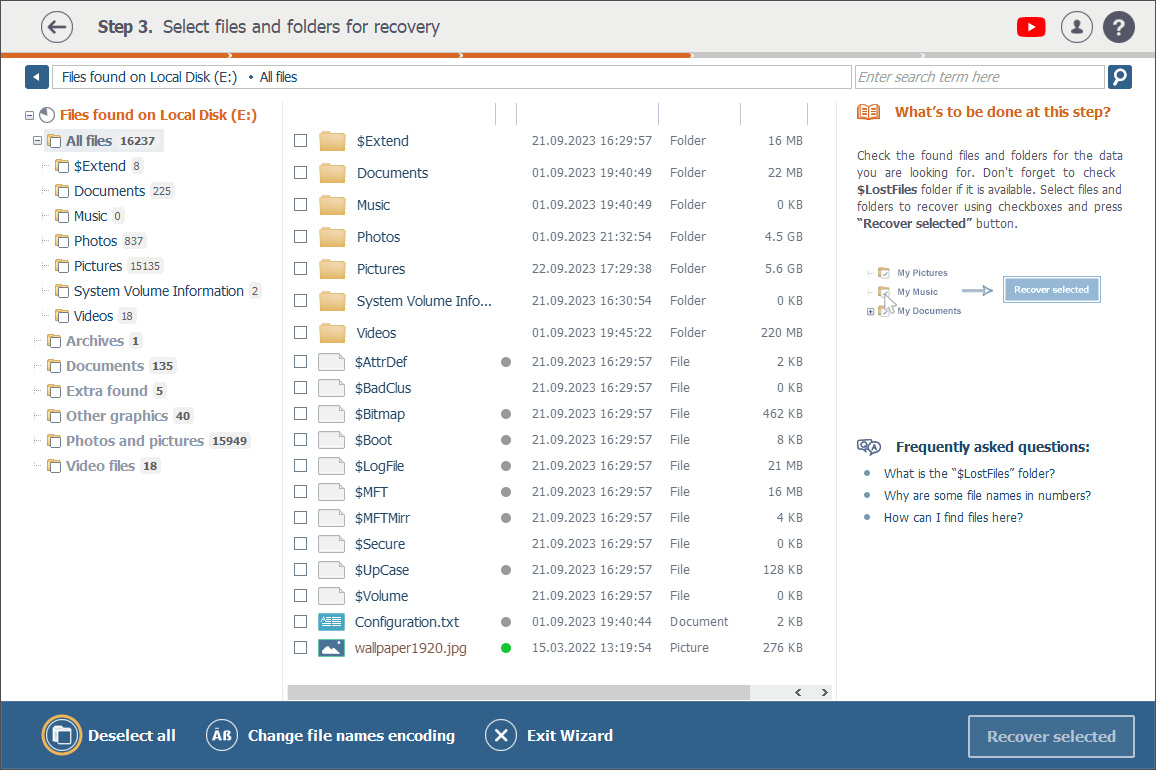
Select all
This feature serves for selecting all the folders and files of the currently opened volume/physical device in Explorer for further copying. Once pressed, it automatically changes to "Deselect all". -
Change file names encodings
With this option one can change the default file names encoding for the correct representation of file names in Explorer. -
Exit Wizard
This function closes both the Explorer window and the program. Please note that if you press it, all scan results will be lost, unless you save them beforehand. -
Recover selected
This button serves for copying the file system items (files and folders) that are currently selected in Explorer to an internal or external location specified by the user.
-
Help section
The "Help" section presents helpful instructions and recommendations for the step of the data recovery procedure you are currently at.
Data browsing
The tree of directories in the folders navigation pane of Explorer allows browsing through the content of the existent or restored file system with the help of the mouse or the arrow keys of the keyboard. To expand/collapse the tree of subfolders of a directory, use the "Plus"/"Minus" button next to its name.
Every item selected in this pane automatically gets opened in the main content area. Also, you may double-click a folder or select it and press the "Enter" key to view its content in the main content area.
You can take one or more steps back in the directory tree by clicking on the required folder element directly in the folders navigation pane or in the address bar above the main content area, or by hitting the "Previous folder" button next to the mentioned address bar.
Viewing object properties
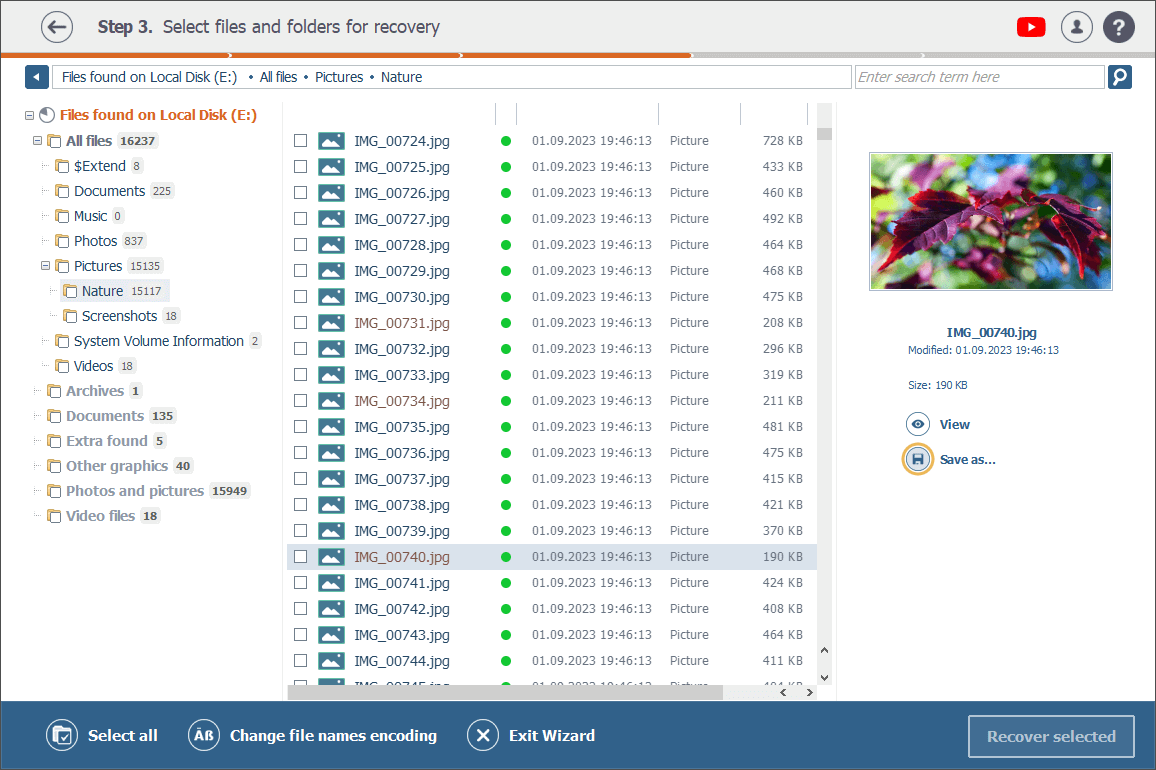
The properties of a file such as name, recovery status, last modification date, type and size are displayed in the main content area and in the right-side pane that opens once you select an item there.
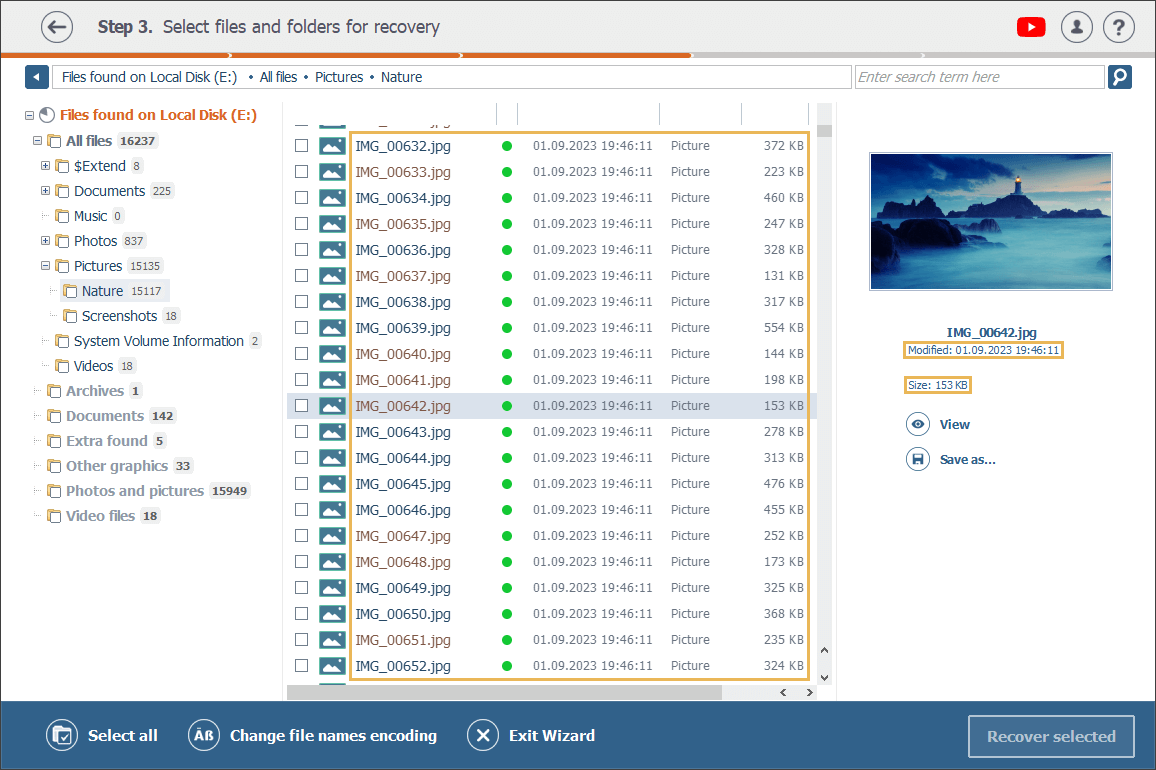
A circular icon next to a file reflects its status: the green one denotes that it’s "good" and has a valid header; the red one indicates a "bad" (zeroed) file; and the gray one appears next to a file that has been partially corrupted, or when it’s impossible to test its integrity due to the format’s specifics.
![]()
Files preview
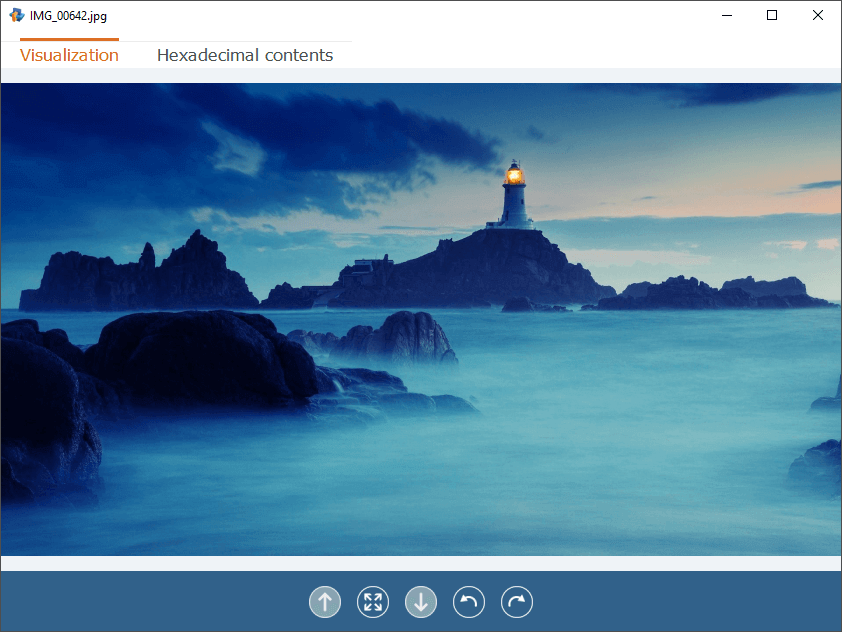
In Explorer there are several ways of in-program previewing of certain types of files. The supported types are images, text documents and PDF-files.
As for other types of files or severely damaged ones, they cannot be previewed in the program interface. Still, they can be viewed in a hexadecimal mode.
When you select a file of one of the supported formats in the main content area, its thumbnail preview automatically appears in the right-side pane.
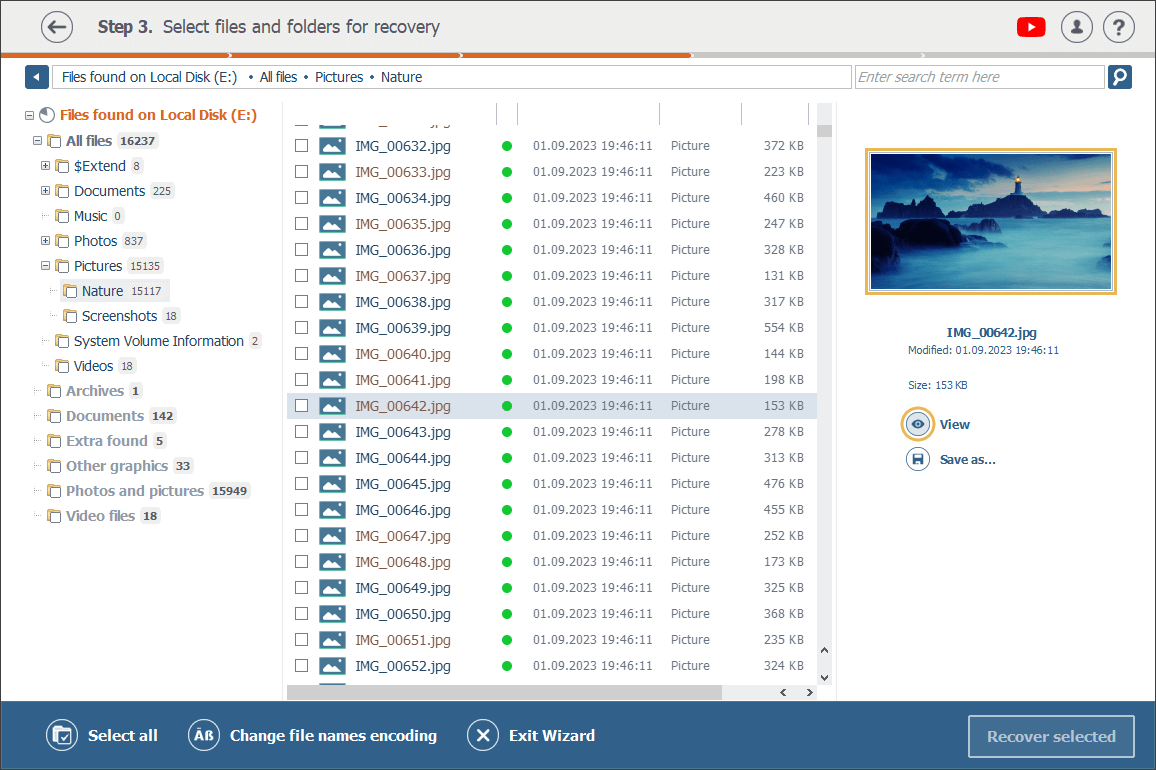
And to get a full-size preview of a file (provided it’s of a supported format), double-click it in Explorer, or select it and press the "Enter" key on the keyboard, or select it and hit the "View" button in the right pane under its thumbnail preview.
Sorting folders/files
In the main content area of Explorer, all files and folders can be sorted by different criteria. For this, click on the top of the column of a respective "characteristic":
-
Name
Press it to sort objects by their names in the direct (or reverse) alphabetical order. -
Date
With this button one can sort objects by the date of their last modification (from the oldest to the newest and vice versa). -
Type
This button lets you sort items by type (folders, files). -
Size
This button allows sorting objects by size in ascending or descending order.
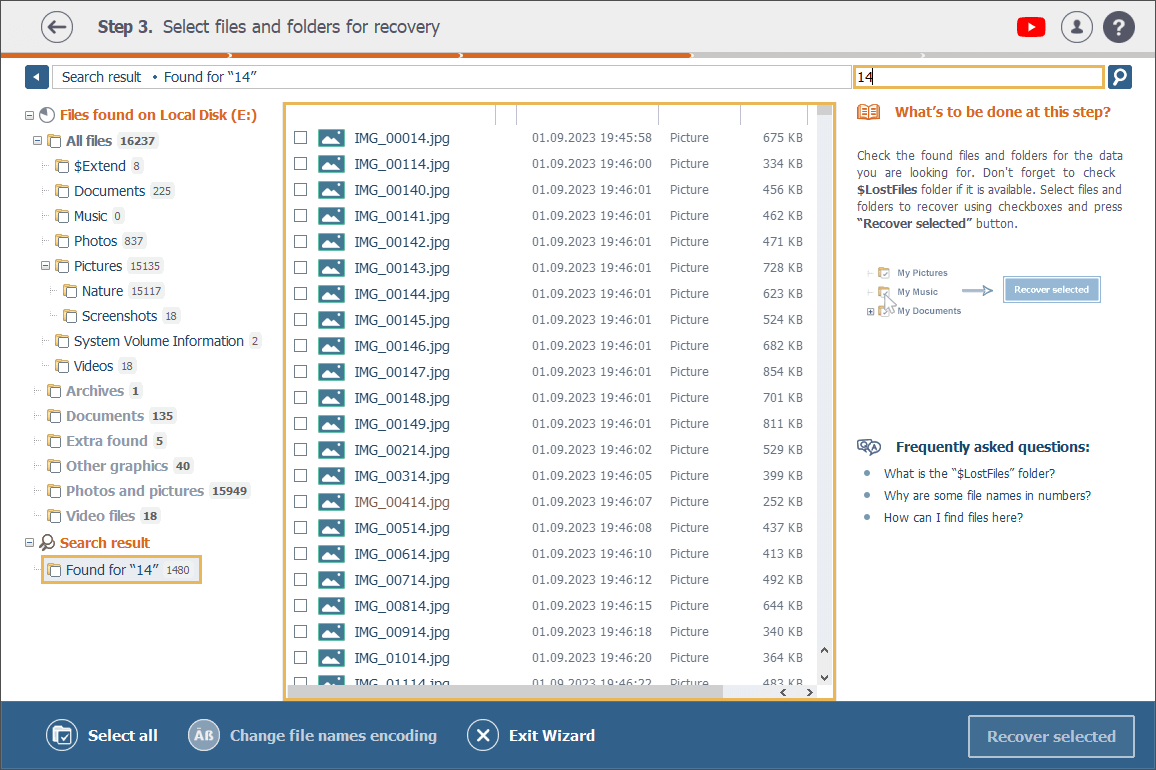
Search for files
In order to find a certain file in Explorer, use the search bar located above the list of files and folders in the main content area. It lets you find any file by specifying its name or a part of it, or even its extension. For this, enter a term in the bar and press the "Search" button (the magnifying glass icon) next to it or just hit the "Enter" key.
Selection of multiple items
In Explorer, it’s possible to select/deselect several objects by putting or removing marks in the checkboxes next to them in the main content area. On the other hand, one can quickly select all the data in a folder by putting a checkmark next to its name in the folders navigation pane in the left part of the Explorer window.
In addition, one can select all the data at once (both the current and the restored files and folders) by pressing the "Select all" option at the bottom of the window. After that, it will change automatically to "Deselect all" letting you cancel the selection with a single click. Therefore, if you need to save almost all the files, you can save your time by hitting "Select all" and then manually deselecting the unnecessary items.
Data saving
In the Explorer window, a single file can be saved with the help of the "Save as…" button under its thumbnail preview. Or you may tick it in the main content area and then press "Recover selected" in the bottom right corner.
As for a single folder, you can save it by selecting it in the folders navigation pane or in the main content area and then hitting the "Recover selected" button at the bottom.
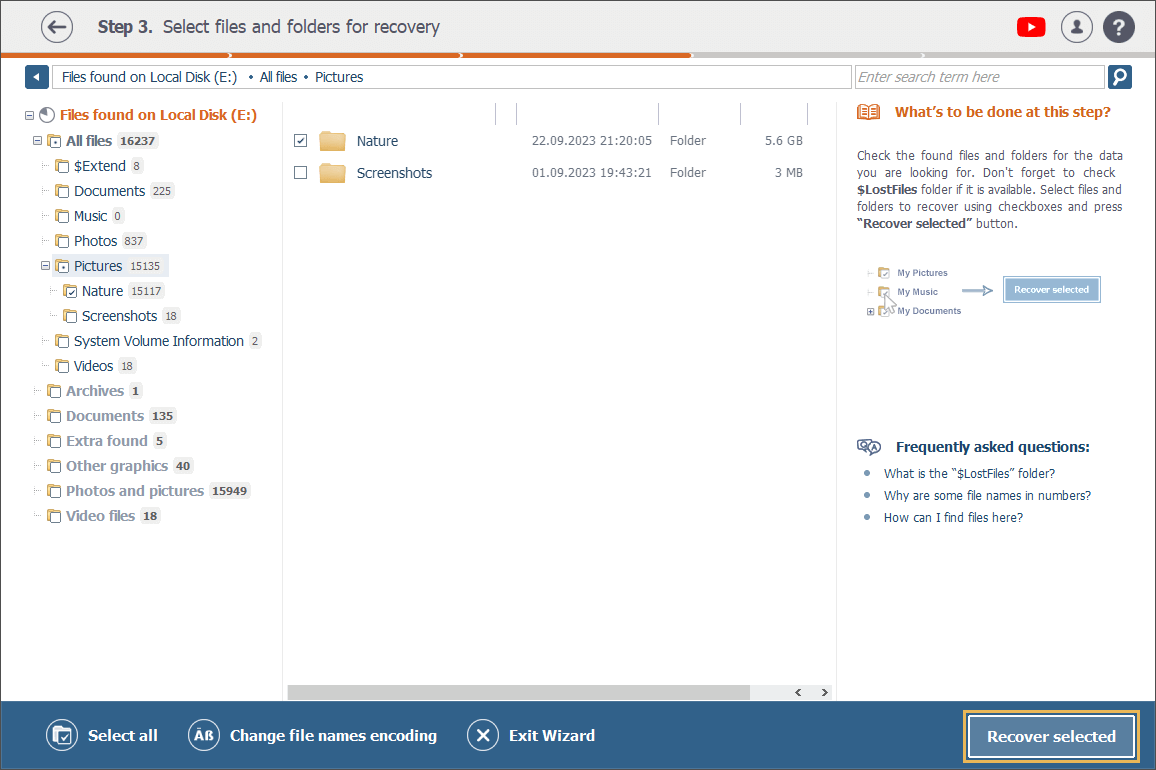
And to save multiple objects, you should first select them one by one in the folders navigation pane or in the main content area and then press the "Recover selected" button below.
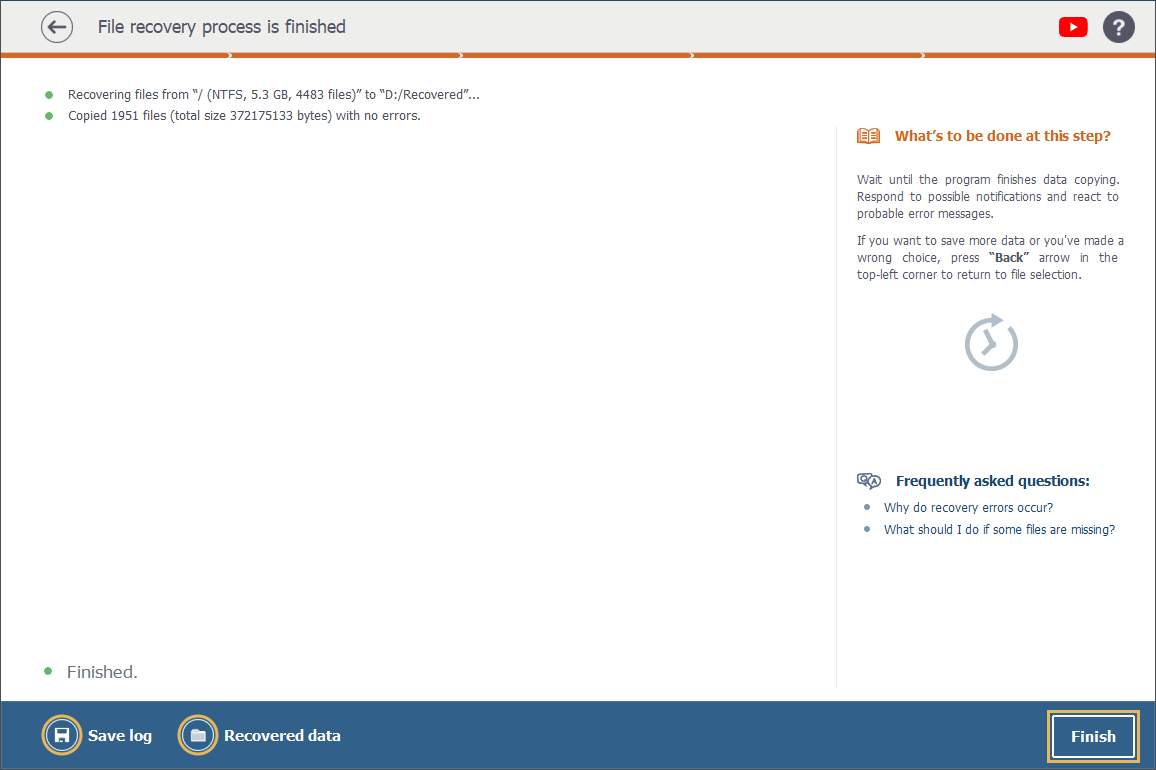
After clicking the "Recover selected" button, you will need to choose a location to save the recovered files to. You can choose among the variants offered by default by the software or click "Custom location" or "Other locations (advanced)" and specify the one you need manually.
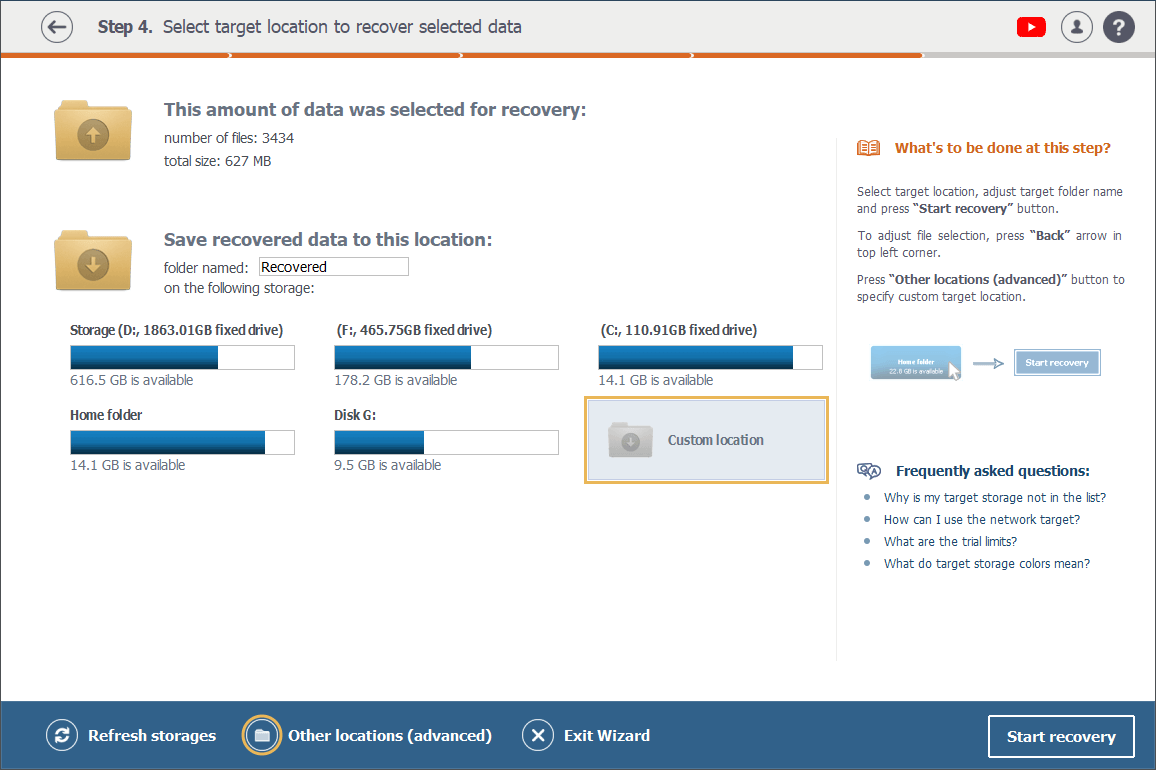
After that, press the "Start recovery" button at the bottom of the window. In the final screen you can choose between closing the program with the "Finish" button, saving the log of the recovery procedure with the "Save log" button, and going directly to the recovered data folder with the help of the "Recovered data" option.