Saving the recovered data
Saving data to a local storage
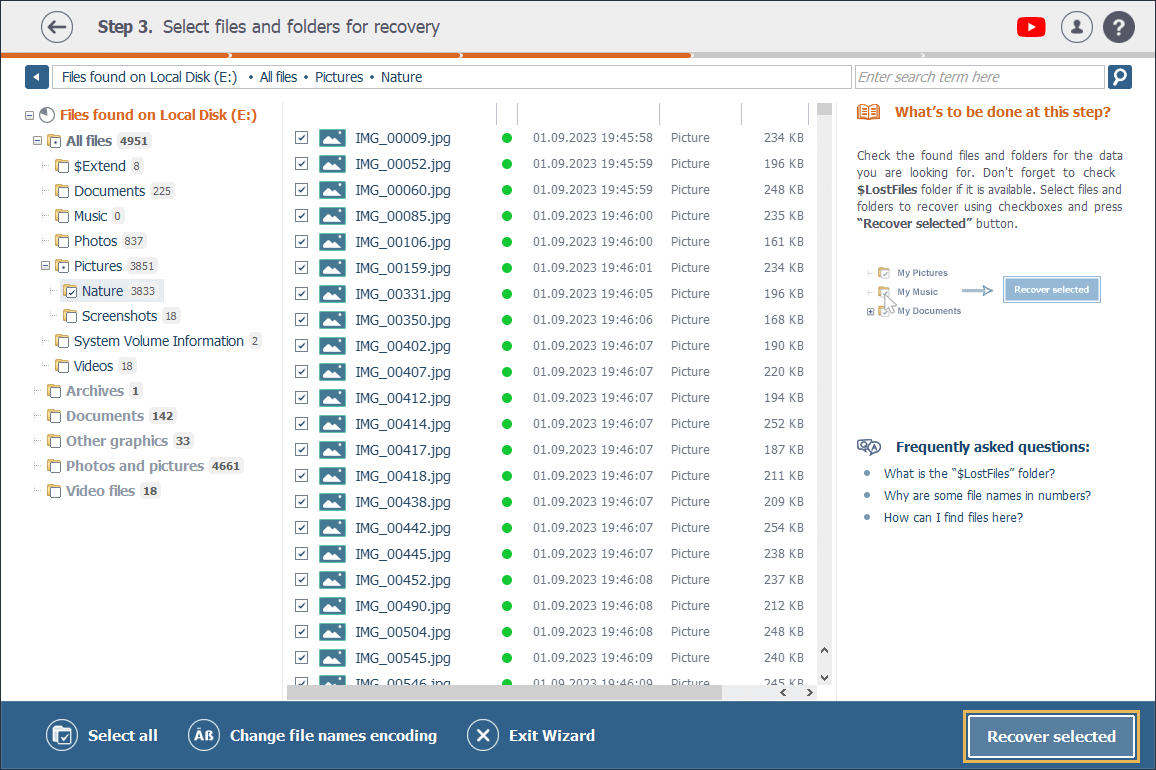
When all the recovered items to be saved are selected in Explorer, you can proceed to copying them to another storage. For this, hit the "Recover selected" button at the bottom of the window.
Alternatively, you may also save a single file with the help of the "Save as" option located under its thumbnail preview on the right.
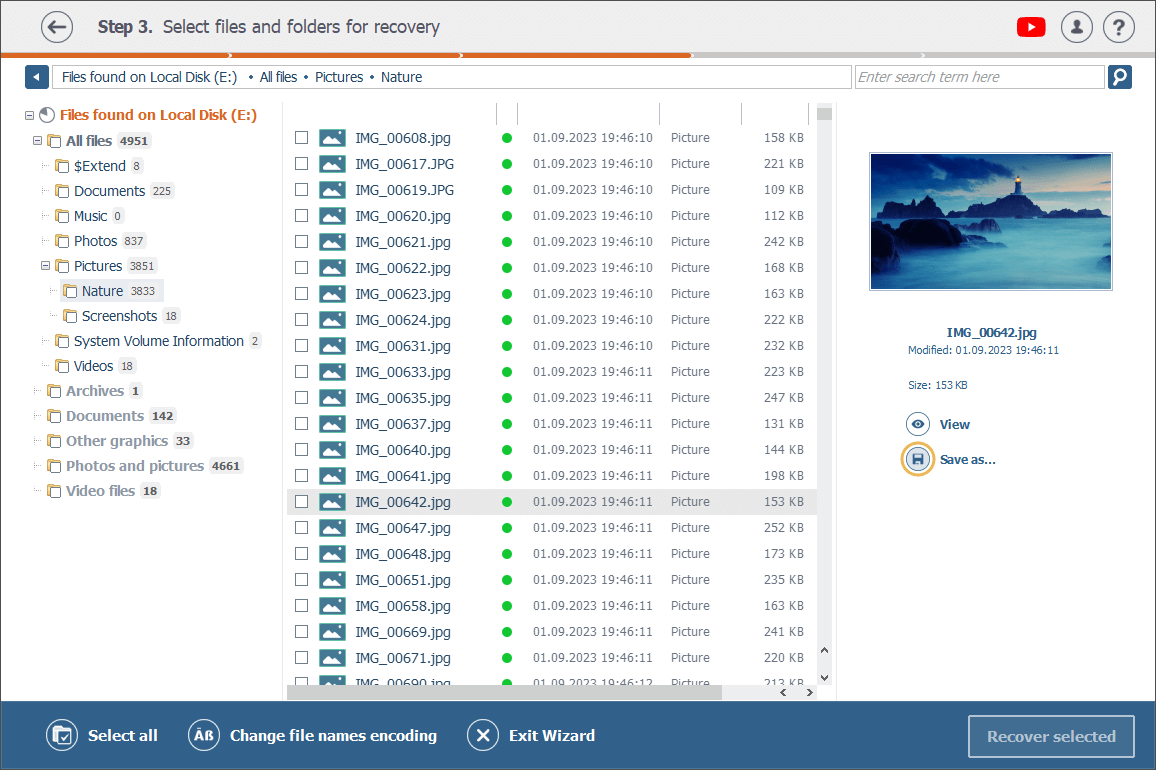
Then you’ll be prompted to specify a target folder.
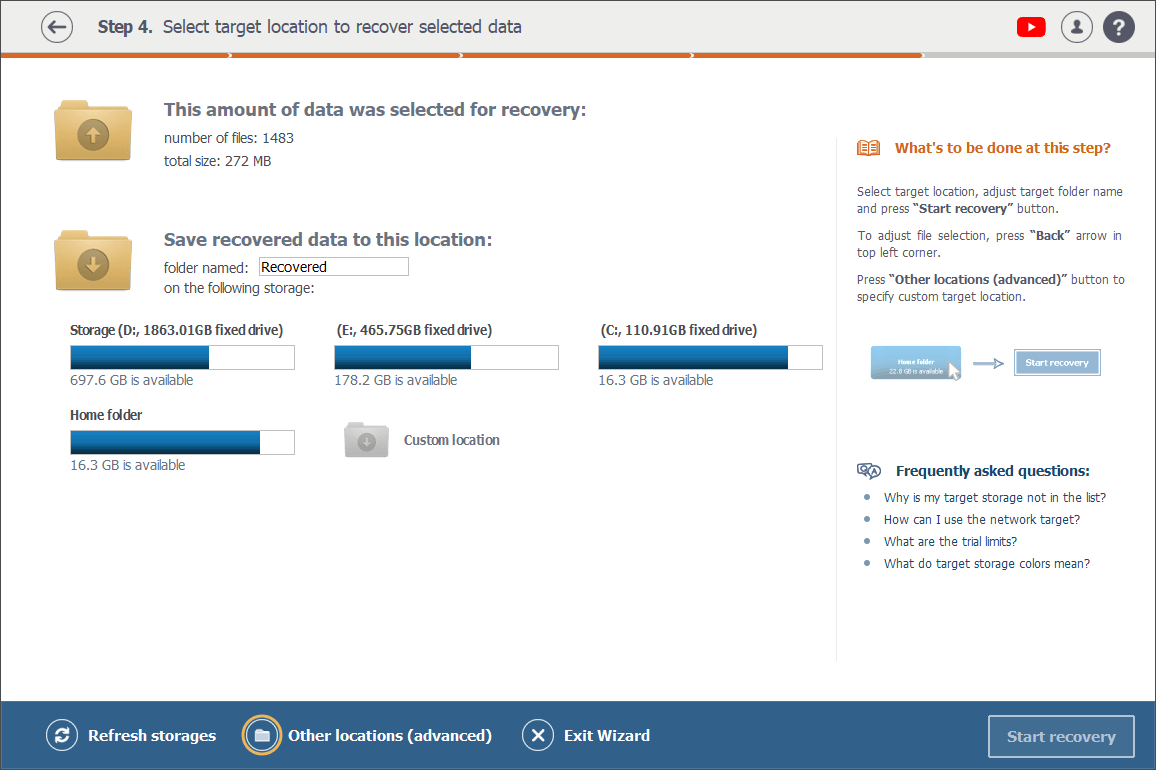
If you press the "Recover selected" button, you’ll get to the Step 4 screen where you can check the number and the size of files you are about to save, enter a name for a new folder the data will be saved to and choose a target storage for this folder.
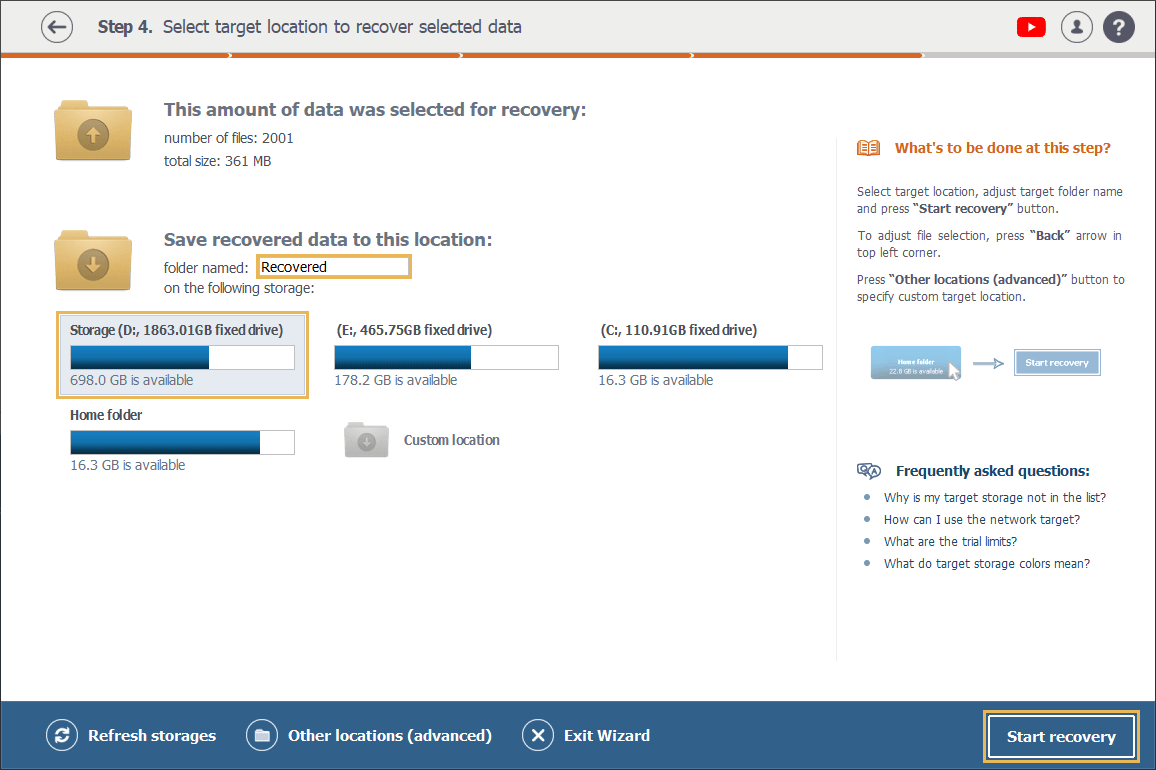
Once the target location is specified, just hit the "Start recovery" button at the bottom of the window.
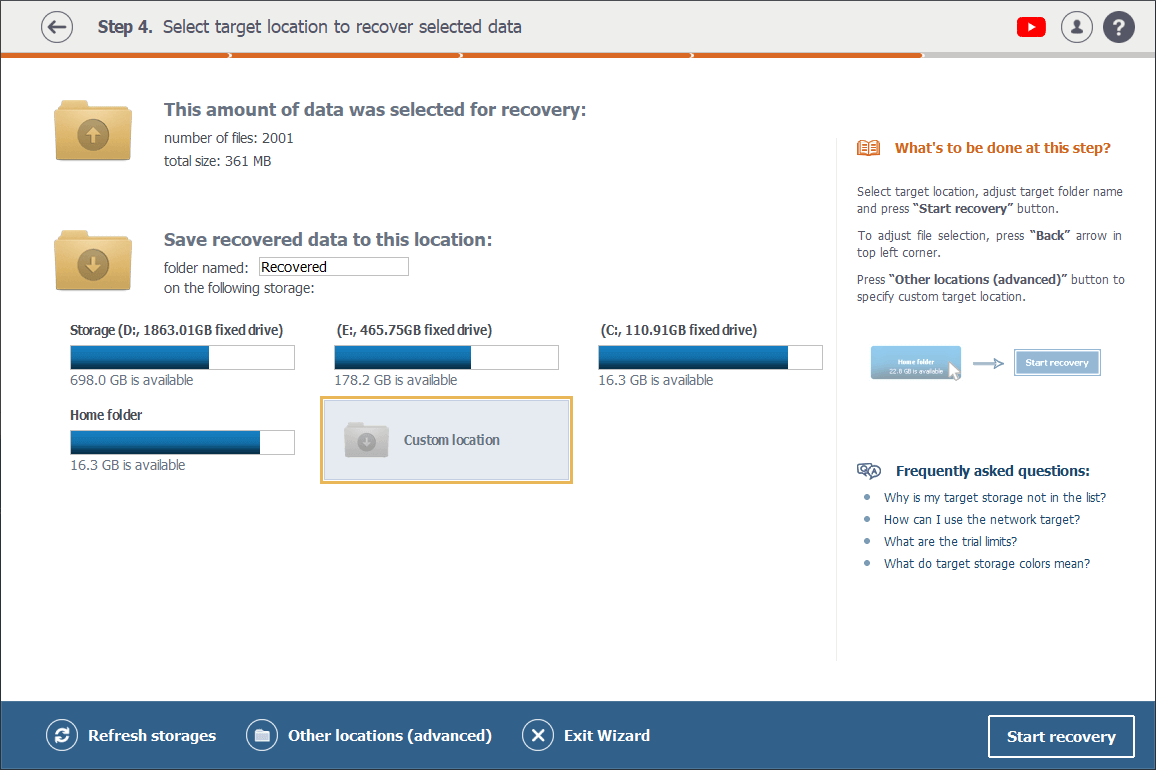
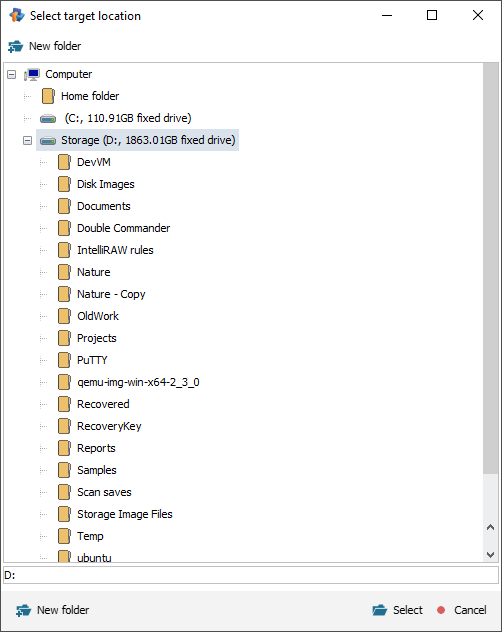
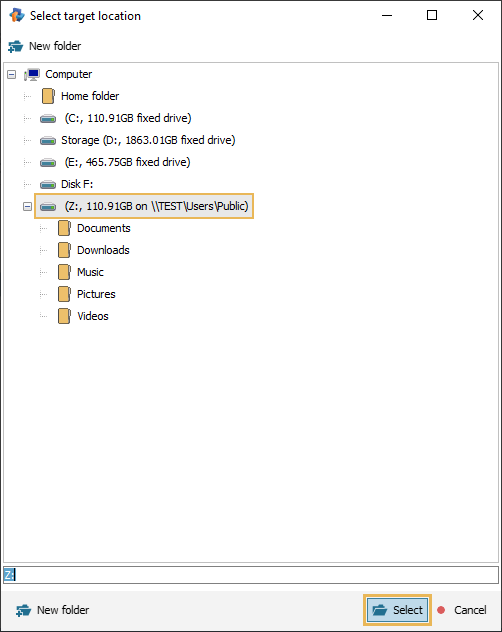
On the other hand, you may also double-click the "Custom location" option, choose a folder in the "Select target location" pop-up window and then hit "Select" in its bottom right corner.
And if you use the "Save as" option to save a single file, you’ll see the "Save this file as" pop-up window. There you’ll need to choose a folder for your file and click "Save".

Please note that you can choose any folder located at any storage device attached to the local PC and recognized by the current operating system, except for the storage the files have been recovered from.
In addition, at Step 4, please also ensure that the target storage has enough free space for your data. You can check it by its color. In Raise Data Recovery, the target storages are marked in different colors: the blue color indicates that the storage has enough space for all the files you have selected for recovery; violet means that there is enough space to save each of the files, but not all of them at once; and gray is used to mark the storage that has space only for some of the selected files.
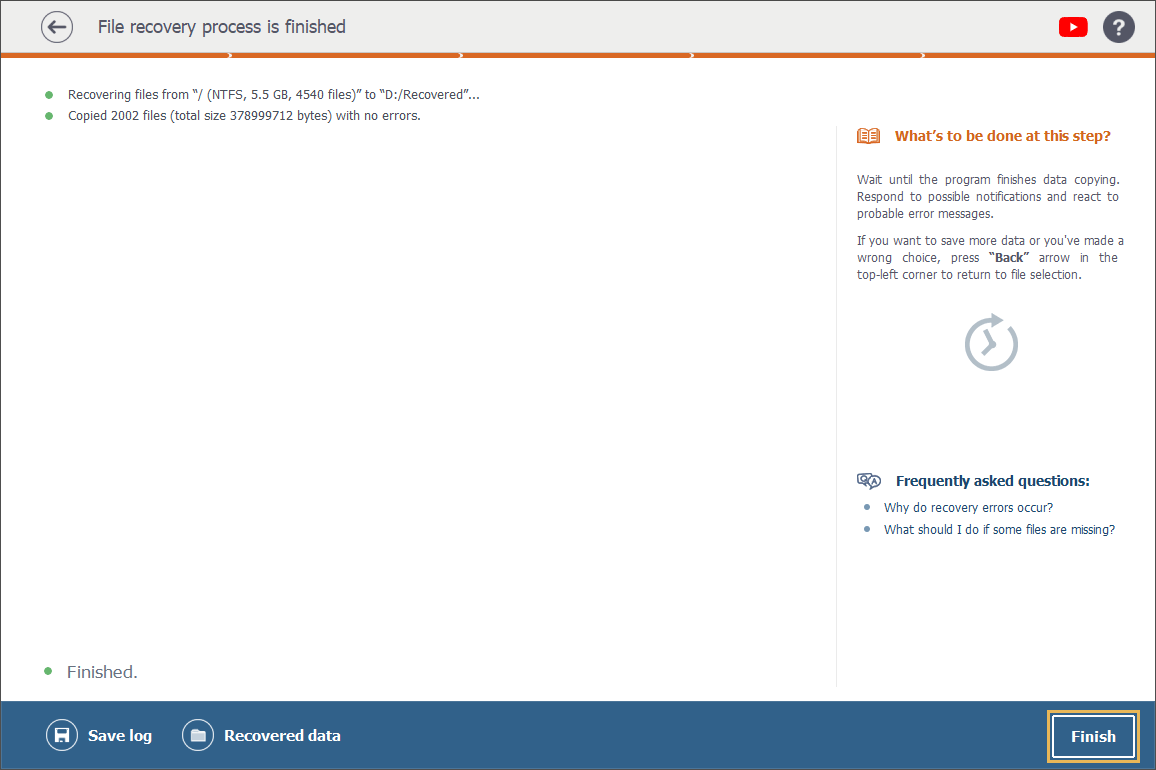
Once all the files and folders are copied, the software will show you the final screen with a number of useful options at the bottom bar. You may click on "Save log" to save the log of the recently completed recovery procedure, or hit "Recovered data" to get directly to the folder you’ve saved the files to, or just close the application by pressing the "Finish" button.
Saving data to a network location
Raise Data Recovery allows saving data to a network storage. However, these storages do not show up automatically among the target ones at the Step 4 as they are not attached directly to the computer, but accessed via network data transmission protocols. So, you need to take a number of preparation steps to make such a storage appear in the program. These steps vary, depending on the operating system of the PC you use for data recovery.
Windows OS, without UAC
To see your network storage among the target storages, map network location to the local logical disk.
Windows OS with UAC
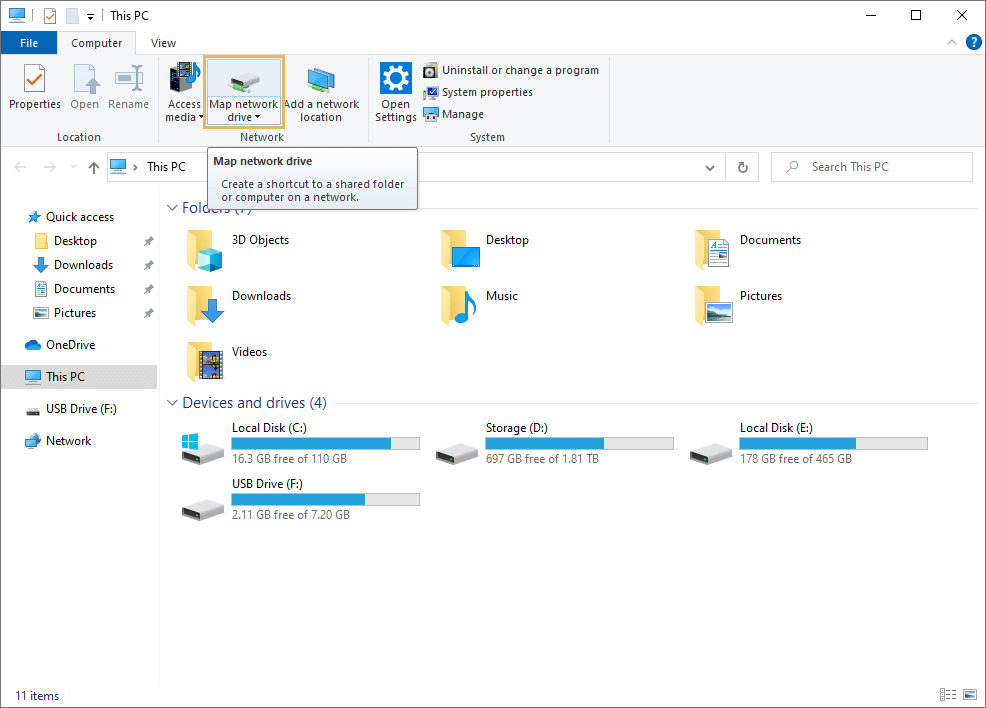
To make your network storage show up under the privileged user account, map it and activate the "Reconnect at logon" option. For this, on your PC:
-
go to "This computer" and click on "Map network drive";
-
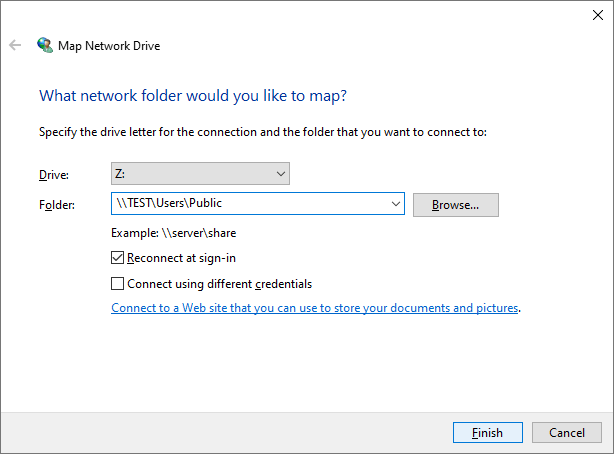
select the required drive and tick the "Reconnect at logon" option;

-
click on "Browse" to find the necessary folder. Select it and press "Finish".
Then, in the interface of Raise Data Recovery:
-
hit the "Other locations (advanced)" option at bottom of the Step 4 screen;
-
select your "offline" network storage and then click the "Select" button.
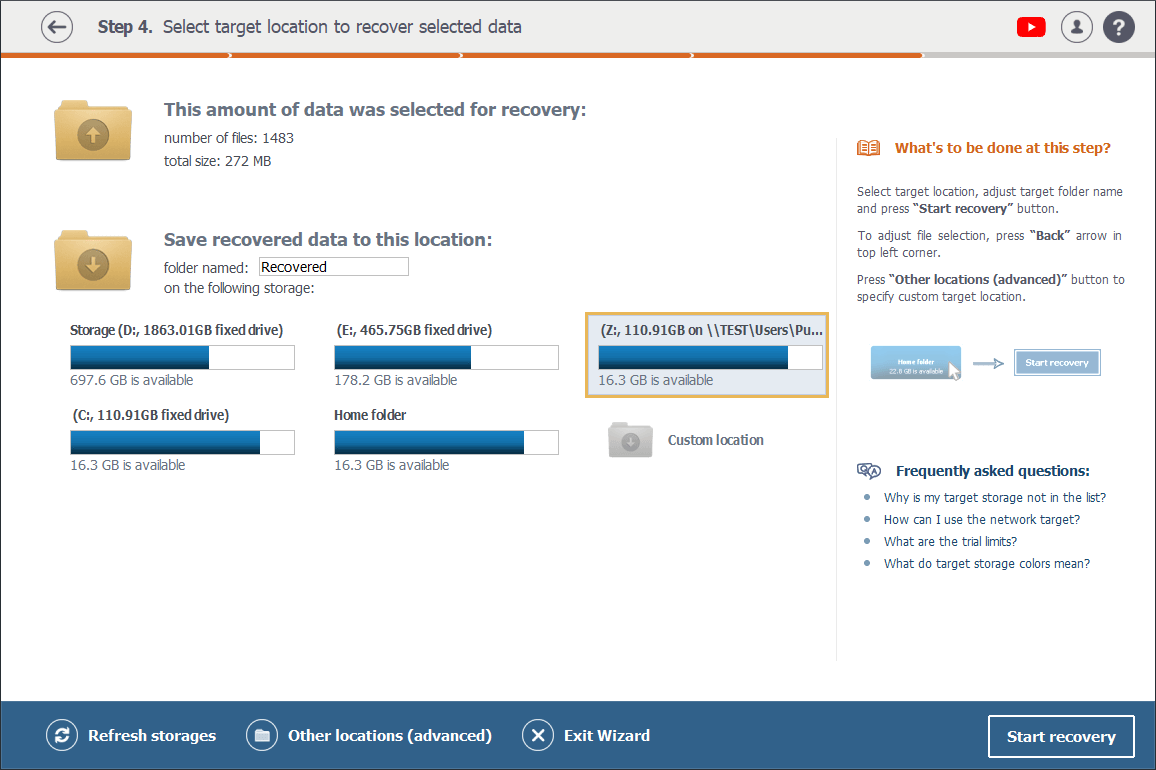
After that, the status of your network location will change to "online" and it will appear in the list of target locations.
Alternatively, you can use its direct path:
-
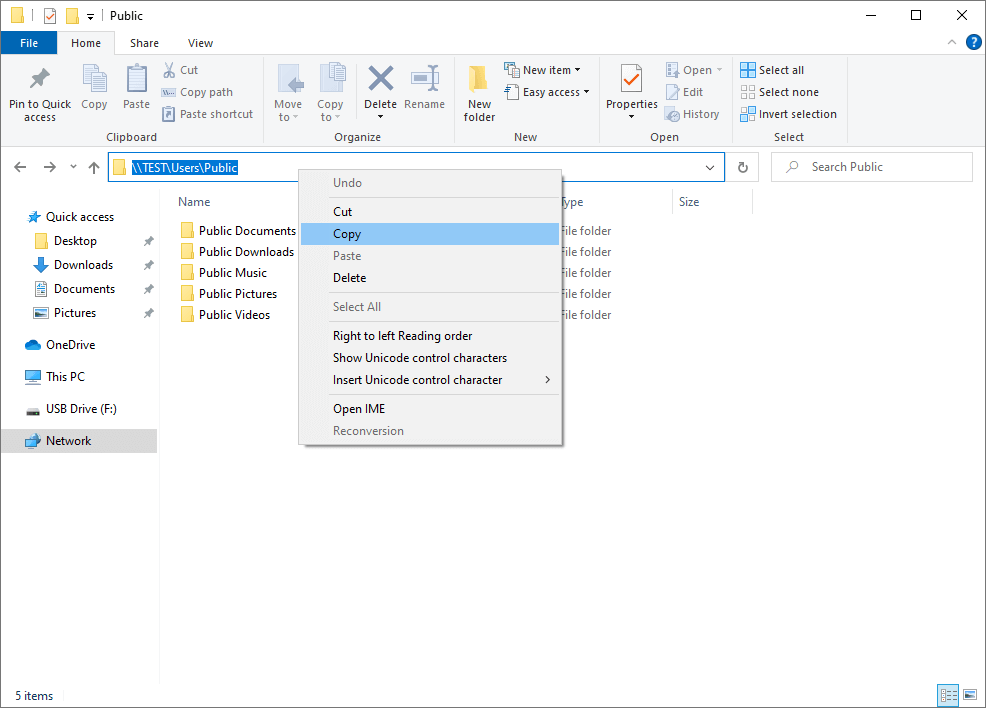
go to the destination network folder under "Network" of Windows Explorer;
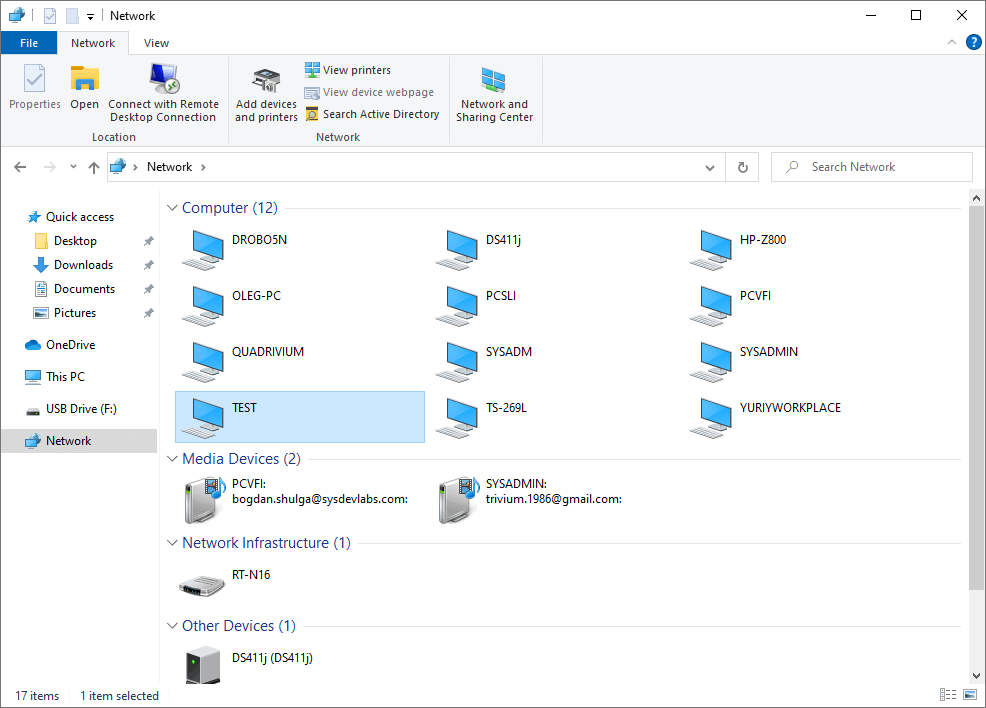
-
copy the network location path from the address bar of Windows Explorer;
-
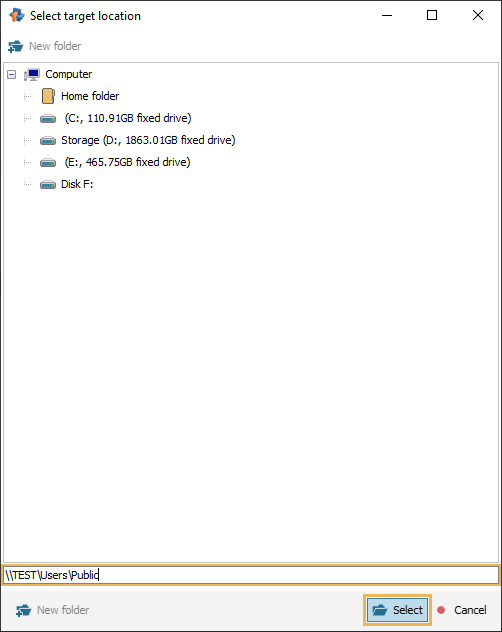
in Raise Data Recovery, at the bottom of the Step 4 screen, press the "Other locations (advanced)" option;
-
insert the copied path into the corresponding address box of the opened pop-up window, press "Select".
macOS
If you work on macOS, connect to your network location with the help of Finder:
-
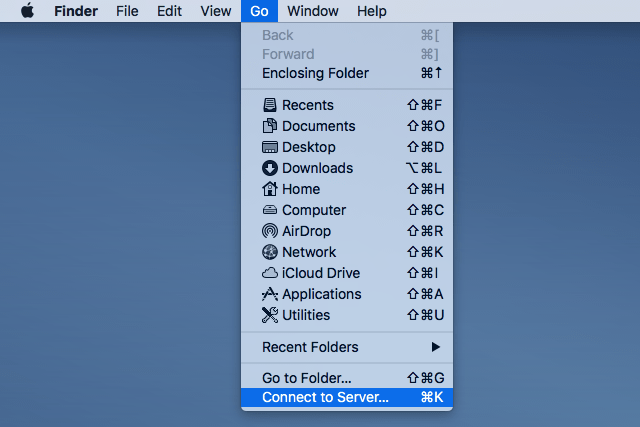
In Finder, open the "Go" menu and click on the "Connect to Server" option, or just use the Command+K shortcut.
-
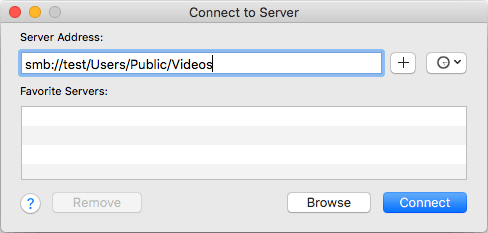
In the opened dialog, enter the shared folder path. Generally, it is smb://server_name/share_name. Or you may navigate to "Network", then to "Servers" and select the necessary location. After that, press the "Connect" button.
-
If necessary, enter your username and password.
-
In Raise Data Recovery, hit the "Other locations (advanced)" option at the Step 4 screen and select the necessary folder.
Linux
As for Linux, there are many ways to access network shared folders, depending on the system configuration. Nevertheless, the most common one consists in mounting the folder in the Terminal using the CIFS-utils package:
-
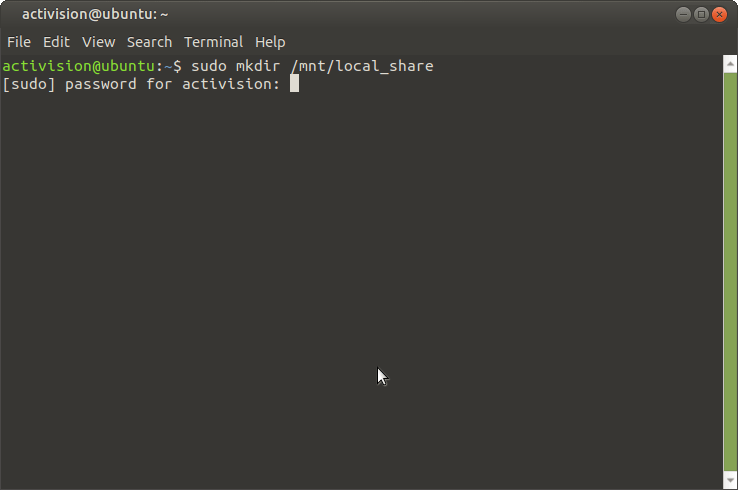
Open the Terminal and create a new mount point folder or use the standard "/mnt" one. For example, "sudo mkdir /mnt/share".
-
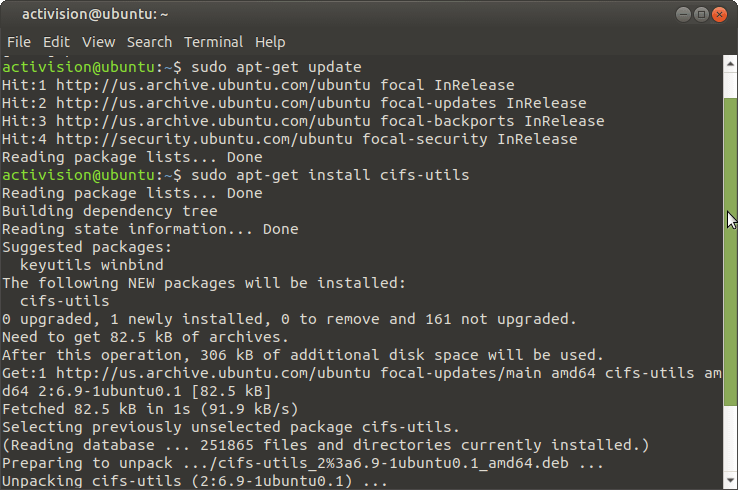
Install the cifs-utils utility, if you haven’t done that yet.
-
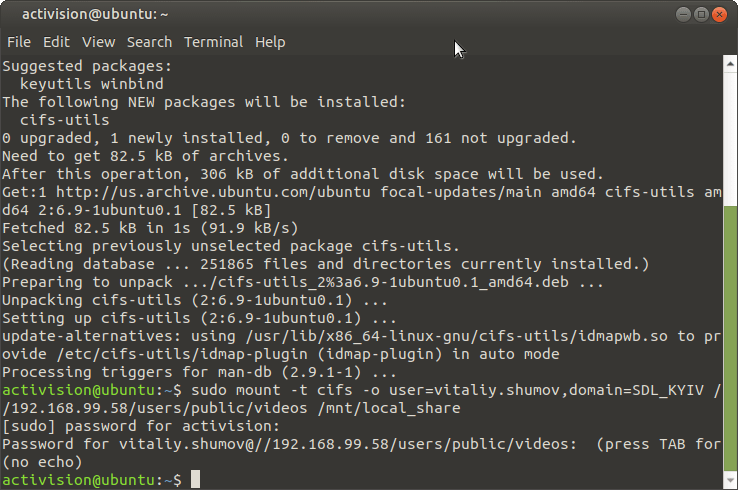
Enter the "mount.cifs //server_name/share_name /mnt -o rw" command in order to mount the shared folder "share_name" of the server "server_name" to the location "/mnt" in a read-write mode. You can also specify the username and the domain (workgroup) within the arguments of the above-mentioned command (e.g. mount.cifs //server_name/share_name /mnt -o rw,username=jonny,domain=domain_name)/.
-
In Raise Data Recovery, press the "Other locations (advanced)" option at the Step 4, navigate to the location of the mount point and choose the necessary target location.