Selecting a storage and running a scan
Selecting a storage
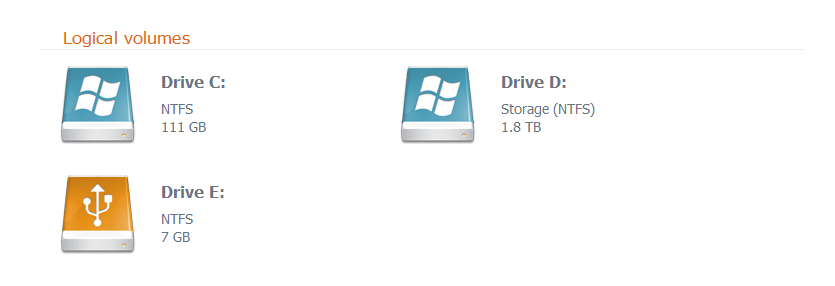
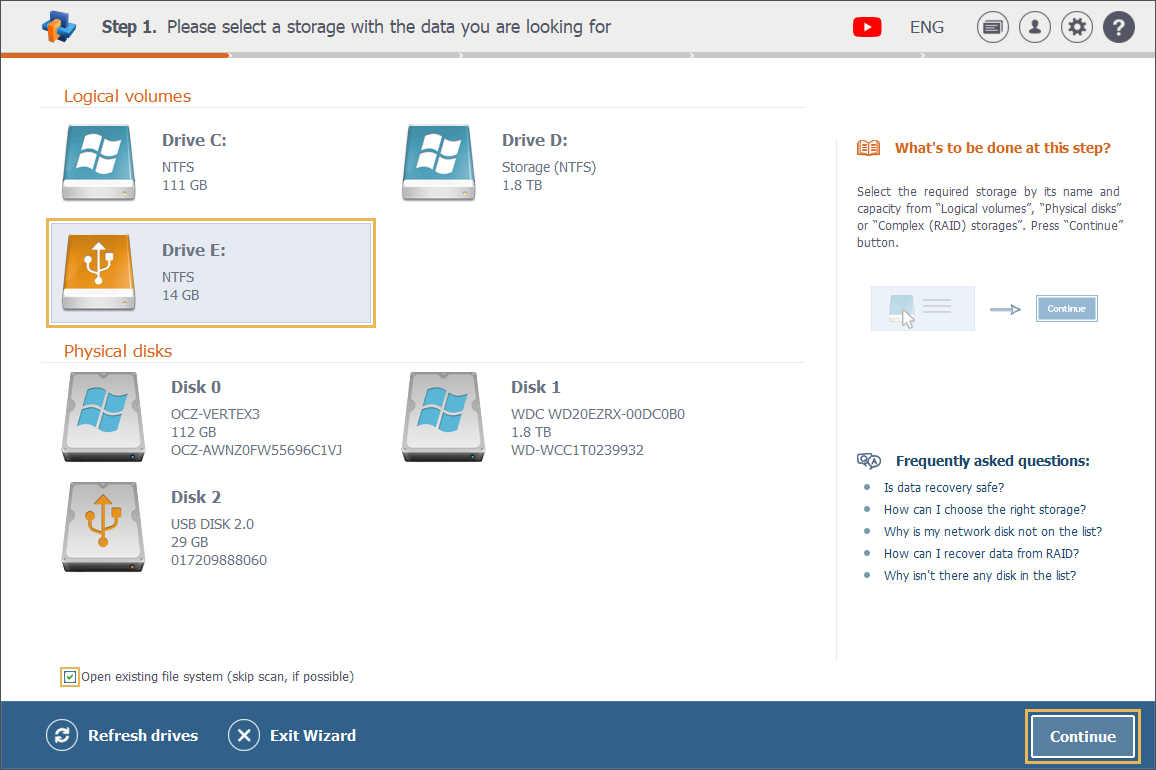
Any data storage detected by Raise Data Recovery and displayed in its interface can be easily selected in the storages navigation area with a single click of a mouse or the arrow keys of the keyboard.
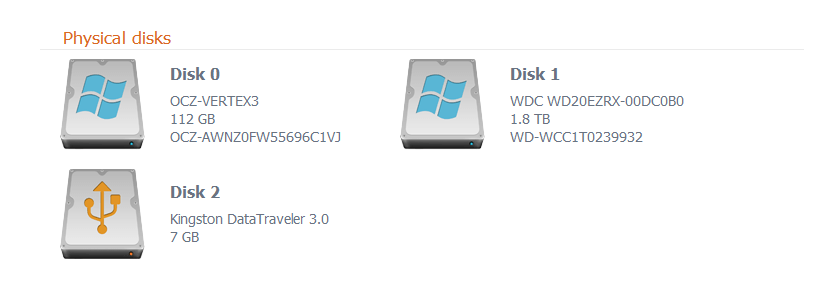
You can switch between the panes and select either a logical volume ("Logical volumes" pane)
or an entire storage device ("Physical disks" pane).
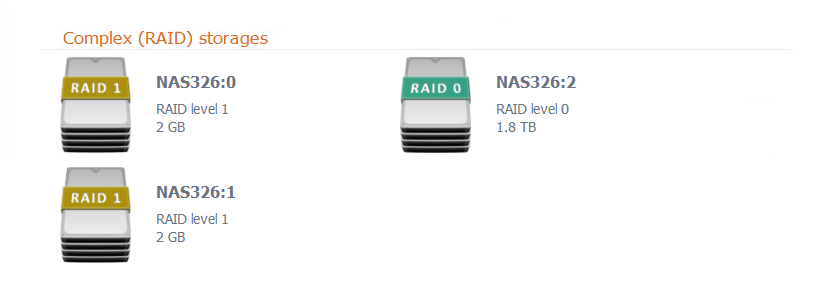
And in case the program has detected a RAID-based complex storage (for instance, a NAS device), you can select it as well in the corresponding pane ("Complex (RAID) storages").
All the details related to the icons representing different storage types can be found in the Storages navigation area section of this manual.
Running a scan
Once a storage or one of its volumes is selected, you can start its scanning in order to find your lost data.
In this regard, please note that when dealing with any type of complex RAID storage, the scanning won’t work if you run it on its individual components instead of the whole unit.
There are several ways to start the scanning: you may select a storage and then press the "Continue" button in the bottom right corner of the main screen or just double-click this storage.
Alternatively, you may first look through the content of a storage using the Explorer element: select an item in the storages navigation area, tick the "Open existing file system (skip scan, if possible)" option and hit "Continue".
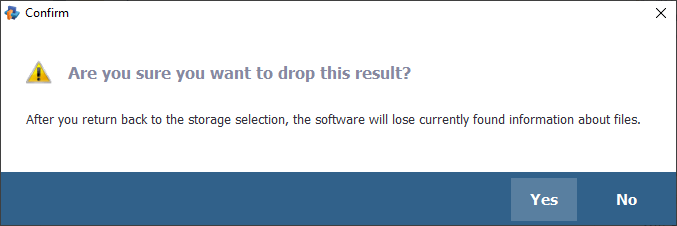
After that, you may return to the main window by pressing the back arrow icon at the top of the screen and confirming your decision in the corresponding pop-up.
![]()
The Raise Data Recovery software automatically applies the most optimal scanning settings. At the same time, you can modify certain parameters according to your requirements in the "Configuration and settings" pane (see more information about it in the Software settings section of the manual).
After you double-click a storage or select it and press the "Continue" button, the scanning will start.
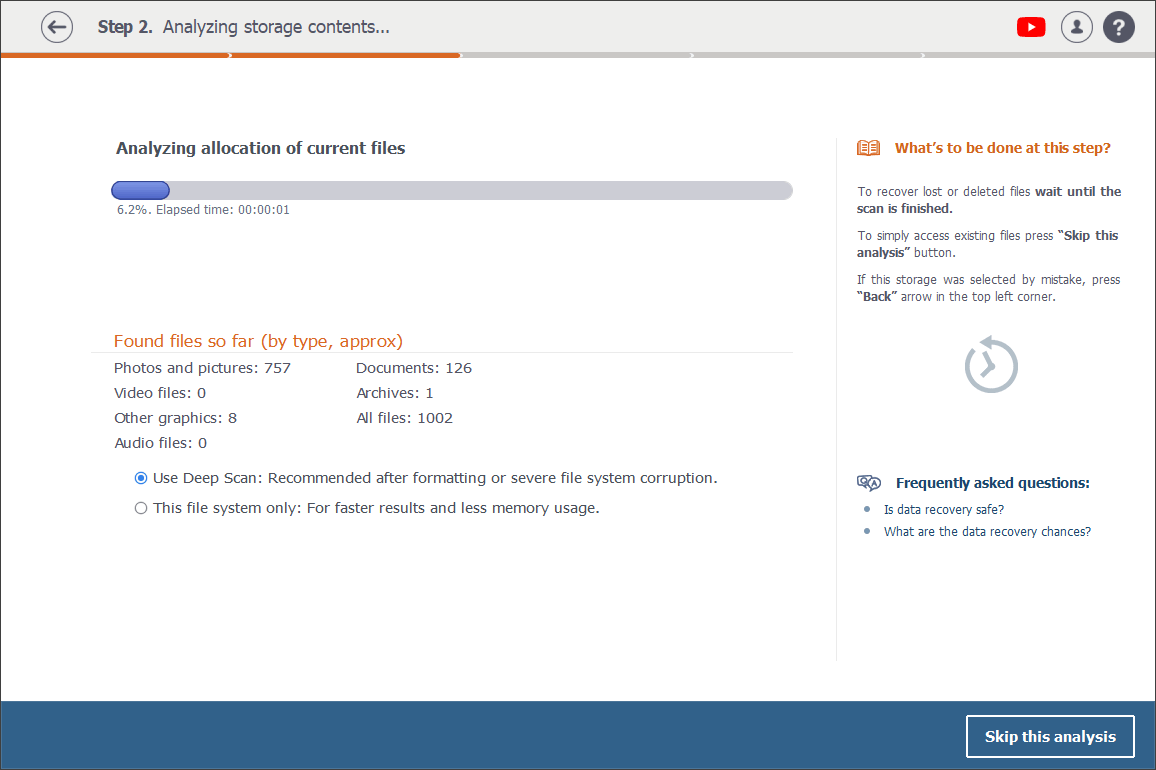
Straight after that, you may use the radio button to choose between two variants of a scan.
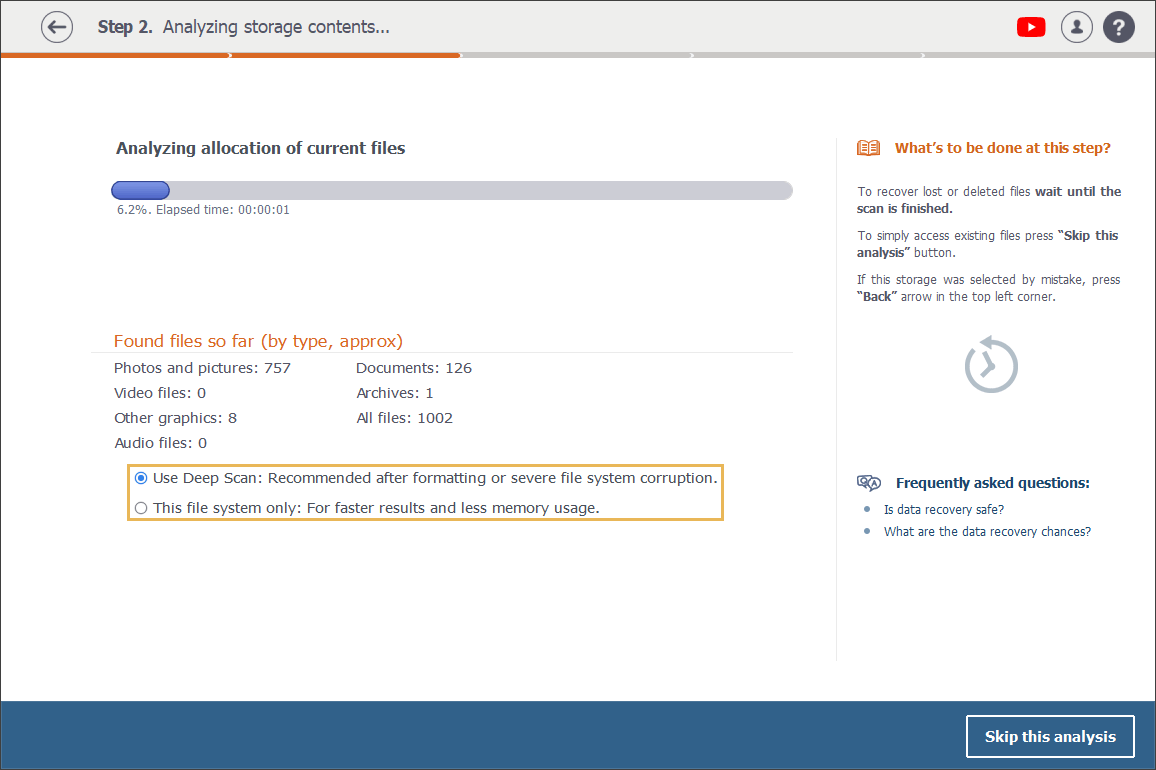
If you have formatted your storage device or suspect severe file system damage, it's advisable to decide on the "Deep scan" option. The program will then thoroughly analyze the storage, searching for lost or corrupted logical structures, and will provide more comprehensive results where a standard quick scan might appear to be not that effective. However, a deep scan may be time-consuming, so you should prepare for a longer wait time. Also, it may take up more memory and processing power.
On the other hand, if you're dealing with minor issues and need faster assessment, the quick scan of "This file system only" will be a more efficient choice that can save you time and resources.
The progress bar on the same screen helps to monitor the procedure. Right under it, you'll see the percentage of the completion and the amount of elapsed time.
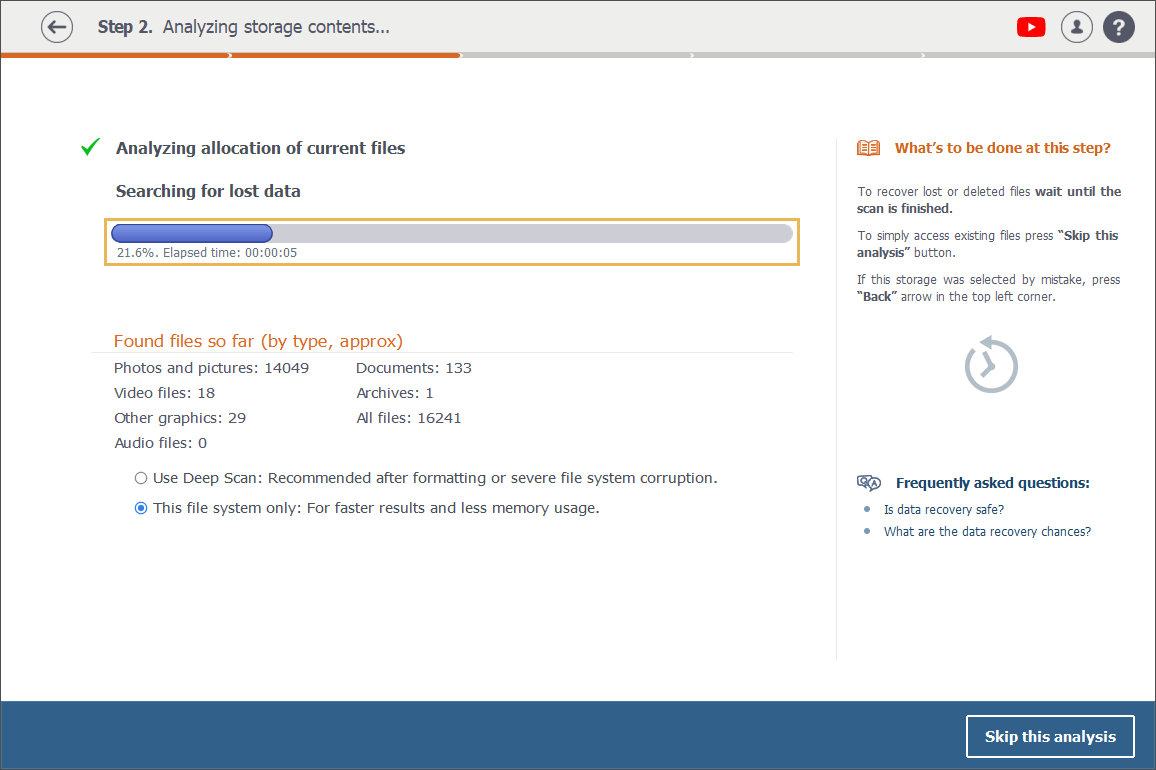
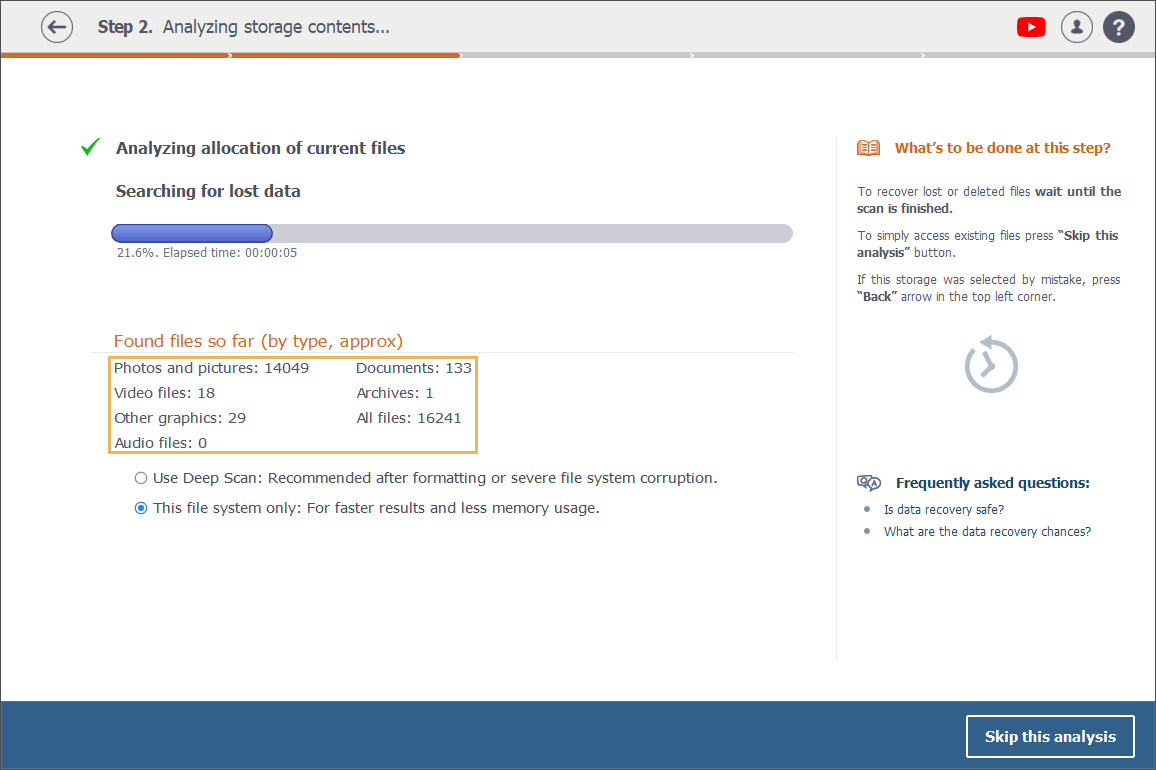
In addition, you will be provided with the statistics on the number of files that have been found for the moment, categorized by their types (e.g., images, documents, videos, etc.).
The progress bar on the following screen helps to monitor the procedure. In addition, right under it you'll see the percentage of the completion and the amount of elapsed time.
You can stop the scanning procedure any time you wish by pressing the "Skip this analysis" button at the bottom and confirming your decision in the corresponding pop-up window.
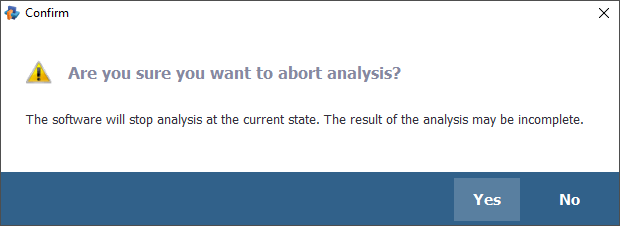
Mind that when you press the "Skip this analysis" button before the scanning is finished by the program, the results of the lost data search might be incomplete. That is why we strongly recommend that you wait till it’s completed by the software.
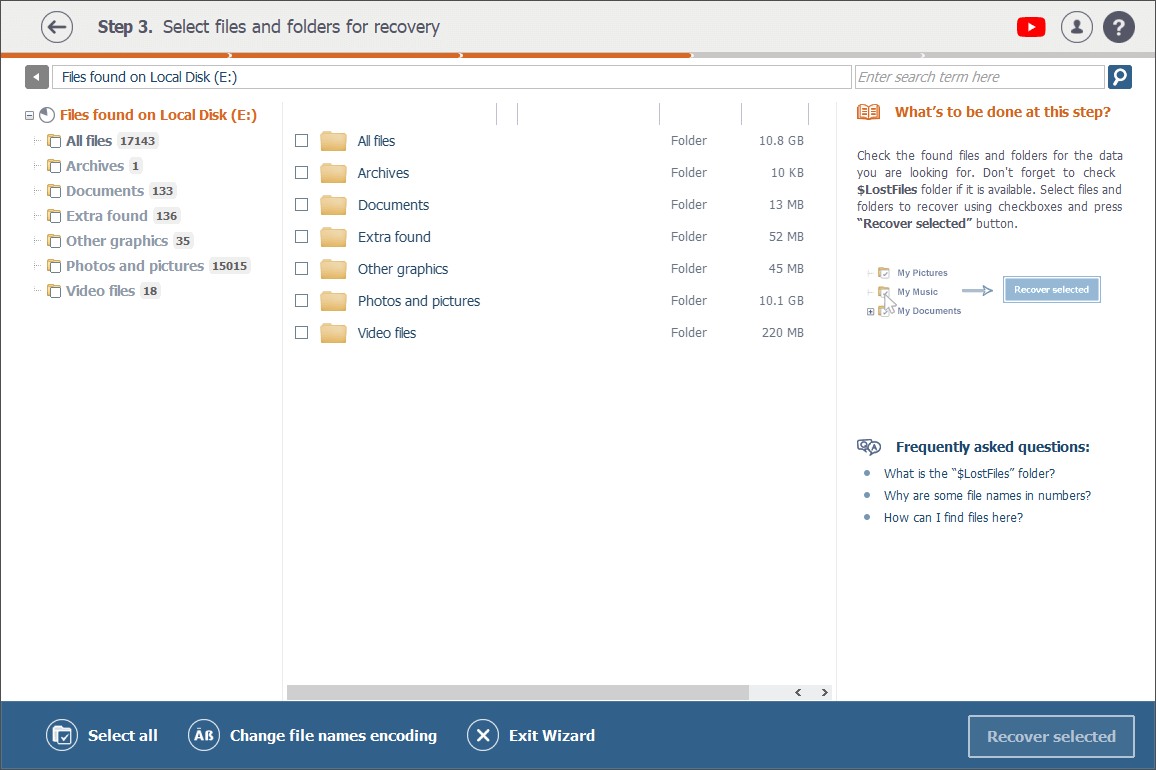
Once the scanning is over, you’ll see its results in the Explorer window that opens automatically.