Elements of the interface
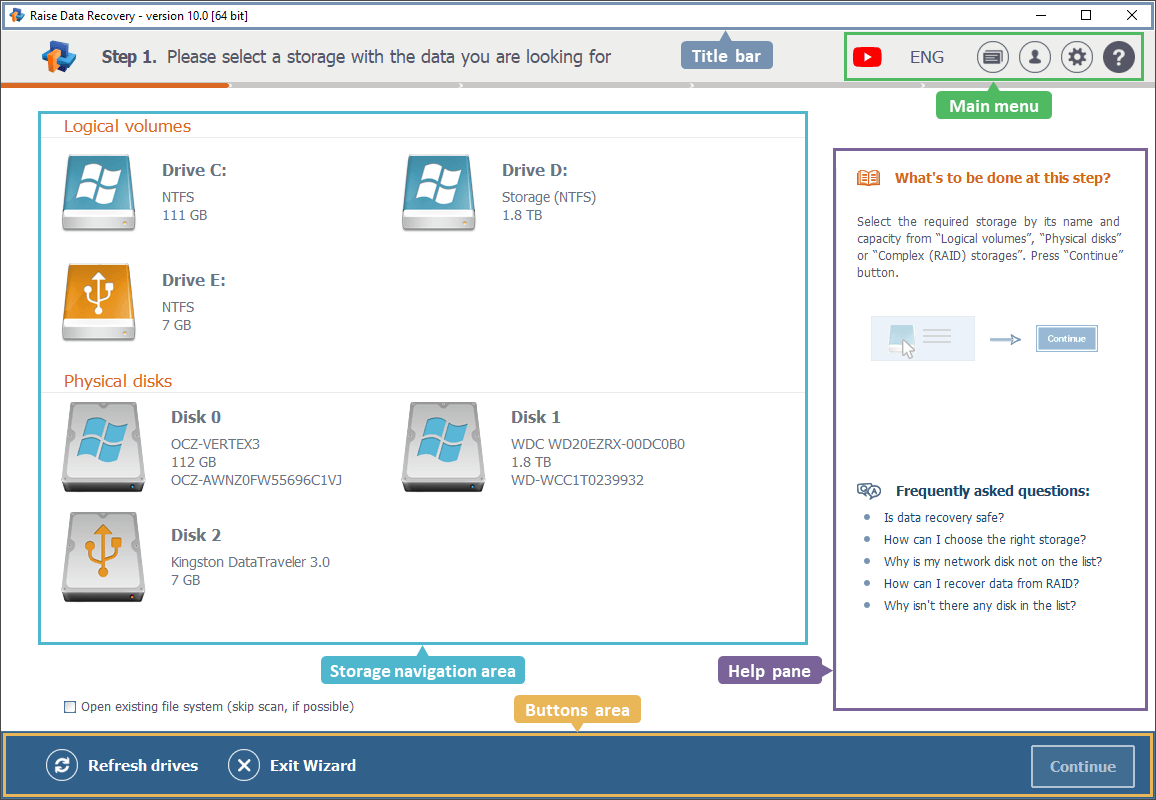
The main window is the first window the user sees when the program is launched. It consists of the title bar at the top, the main menu under it, the storages navigation area with the detected storages panes on the left side, the help pane on the right side of the screen, and the buttons area at the bottom.
Below you can find a general overview of the above-mentioned interface elements.
Title bar
![]()
The title bar at the very top of the main window presents the name of the software, its current version and several control buttons: minimize, restore/maximize, close.
Main menu

The program’s main menu includes the following elements: the "Video guides" (1) icon that redirects you to the playlist of Raise Data Recovery video tutorials on the developer’s official YouTube channel; the "Language" option (2) for changing the program’s interface language; the "Software events log" item (3) for viewing the list of the program's main events; the "Software license" option (4) providing information regarding the software license; the "Configuration and settings" item (5) and the "Help" option (6) activating the help pane that appears on the right side of the main window.
-
Video guides
This menu item opens the Raise Data Recovery video tutorials playlist on the official SysDev Laboratories’ YouTube channel. There you can find videos explaining how to activate your software license, recover files from a formatted storage and so on. -
Language
This function allows choosing an interface language among the available options: English, Ukrainian, Polish, German, Spanish and Portuguese. Please note that the change will take effect only after the restart of the program. -
Software events log
Clicking on this option opens a dialog window allowing you to trace/save the main events that take place during your work with the application: storages and file systems detection, errors and others. Please find more information about the Events Log dialog in the corresponding section of the manual. -
Software license
Hit this item to check the activated license information and the expiration date of the software updates period or to access the Add license function. The latter one opens the license activation window presenting the Registration name and the Registration code fields, as well as the links to the Licensing options and the End-User License Agreement. -
Settings
This option opens the general settings pane. Please read more about the Software settings in the respective section of the manual. -
Help
The "Help" item opens a right-side pane containing helpful tips and recommendations for each step of the data recovery procedure.
Storages navigation area
There are two major panes in this part of the software’s main window. The "Logical volumes" pane shows only the disk volumes recognized by the current operating system and detected by the program.
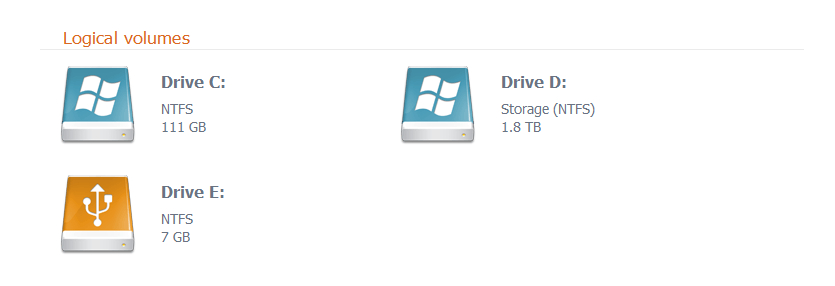
Every volume is displayed with the name assigned to it, its file system and size.
As the name of the "Physical disks" pane indicates, there you can find the physical stand-alone devices detected by the program, for example, internal HDDs and SSDs, portable USB storages, memory cards, etc.
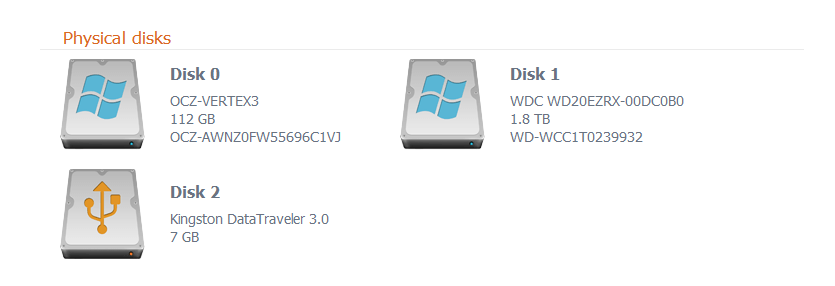
Every storage device is shown together with its model, size and ID.
In addition, when the program detects a RAID-based storage, there will be one more pane, Complex (RAID) storages, underneath the above-mentioned.
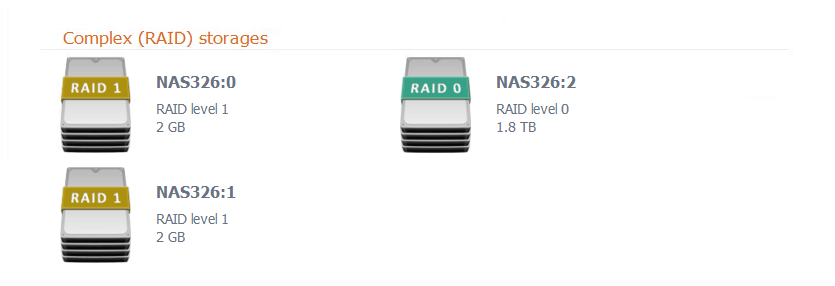
Please have a look at a more detailed description of this element and its usage in the Storages navigation area section of the manual.
At the bottom of this area there is a useful option, "Open existing file system (skip scan, if possible)". It allows viewing the data that is currently available on storage directly in the incorporated Explorer (File browser) of Raise Data Recovery. For this, go to the "Logical volumes" tab, select a volume, tick this feature and press "Continue" at the bottom of the window.
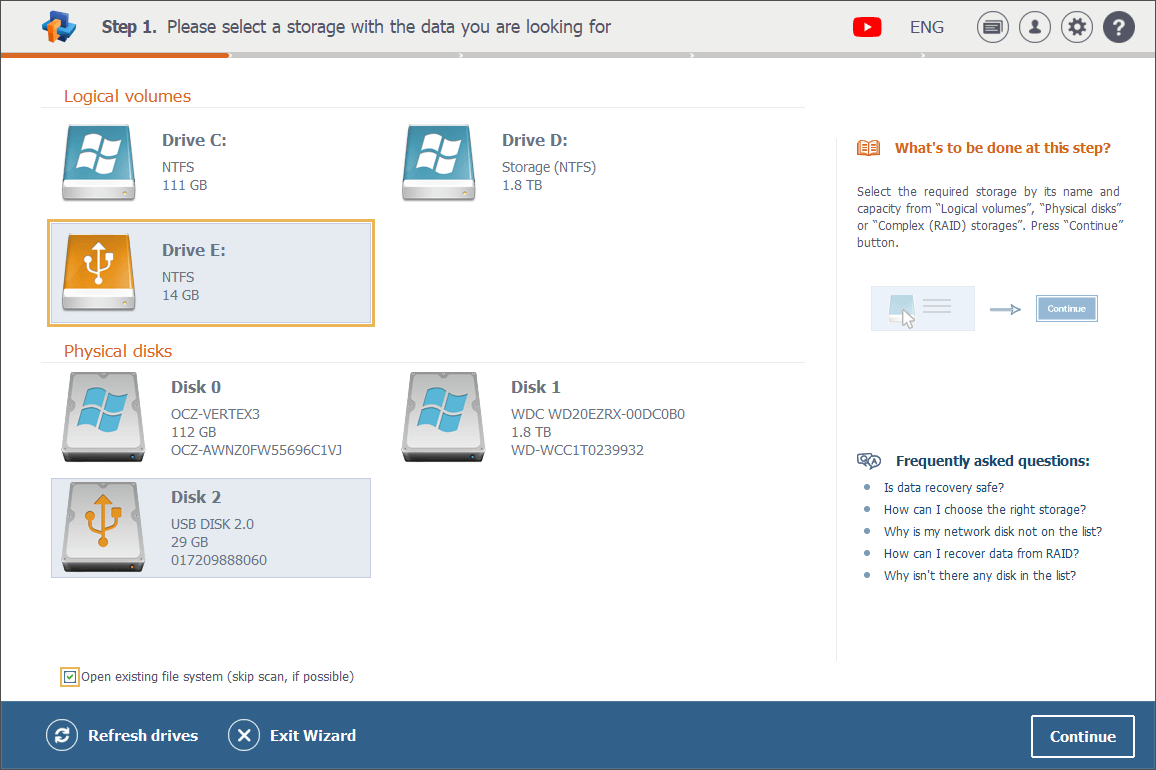
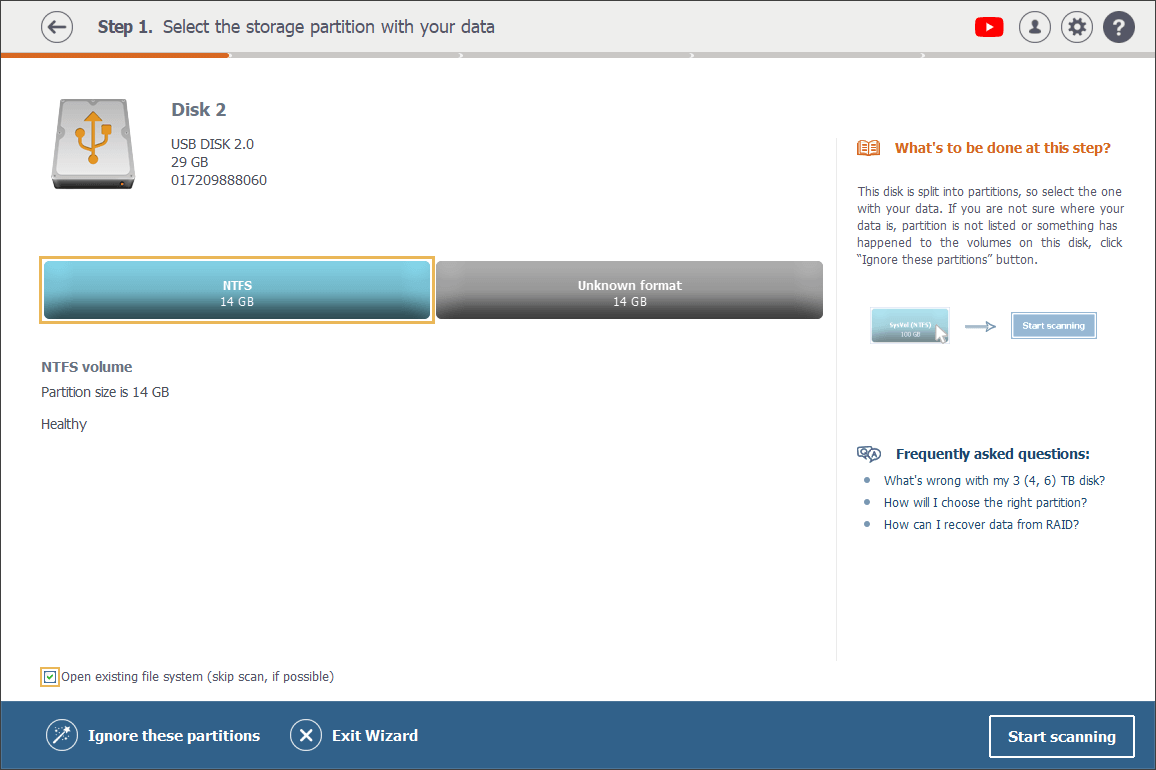
You can do the same via the "Physical disks" pane, but there will be two more steps to take: after selecting a drive, ticking the Open option and hitting the "Continue" button, you’ll need to select a partition to view and then press "Start scanning" in the bottom right corner.
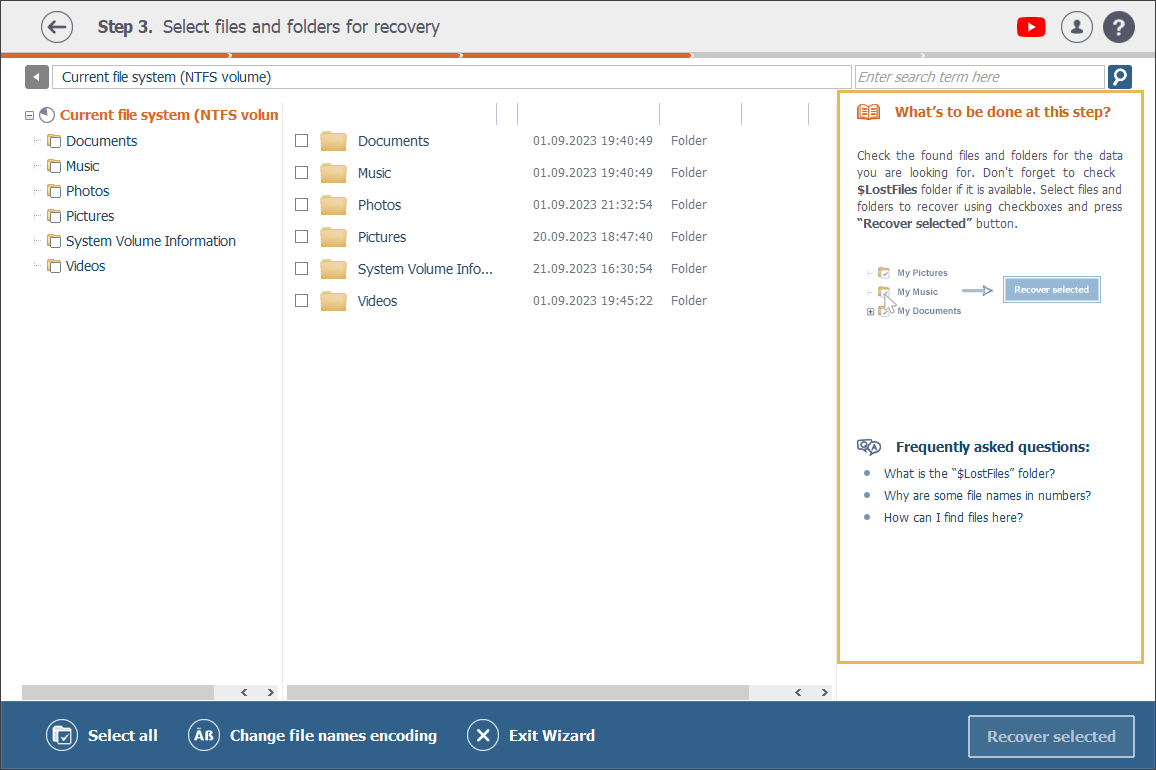
Find a detailed Explorer overview in the corresponding manual’s section.
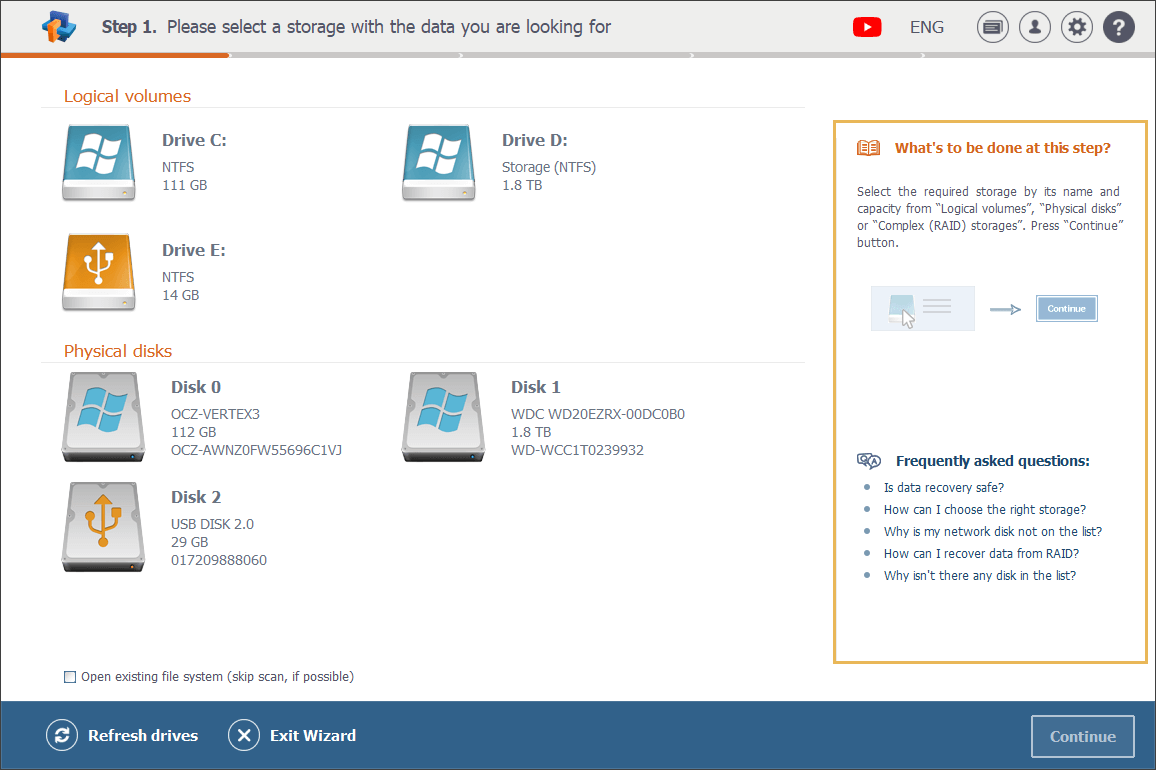
Help pane
This pane consists of two parts: the upper one shows a tip for the step you’re currently at and below it there is a list of FAQ links, each redirecting you to the corresponding article on the software’s website. The help information at the top of the pane varies depending on the data recovery step.
Buttons area

At the bottom of the main window there are several important buttons. One of them, "Continue", gets activated only when any of the detected storages is selected.
-
Refresh drives
This button serves for updating the list of currently detected storages. When you connect a storage after the program has been launched, hit this button to make it find and show the recently connected device in the interface. -
Exit Wizard
Press this button to close the program. -
Continue
Use this button to start the scanning of the selected storage. During it, the software examines both the structure and the content of the storage looking for missing data, including deleted files, formatted volumes, damaged file systems, etc.